“How to wire solar panels step-by-step for home”
However, installing a solar panel system can seem like a daunting task, especially when it comes to wiring the panels together. In this article, we will provide a step-by-step guide on how to wire solar panels for your home, making it easier for you to harness the power of the sun.
Before You Begin
Before you start wiring your solar panels, it’s essential to ensure that you have a good understanding of the basics of solar panel systems and the necessary safety precautions. Here are a few things to keep in mind:
- Understand the components: A typical solar panel system consists of solar panels, a charge controller, a battery bank, and an inverter. Make sure you understand the function of each component and how they work together.
- Follow safety guidelines: When working with electrical systems, it’s crucial to follow safety guidelines to avoid injury or damage to your equipment. Always disconnect the system from the grid and use protective gear such as gloves and safety glasses.
- Check local building codes: Before installing your solar panel system, check with your local building department to ensure that your system meets all the necessary building codes and regulations.
Step 1: Plan Your Solar Panel System
Before you start wiring your solar panels, you need to plan your system. Here are a few things to consider:
- Determine your energy needs: Calculate your energy needs based on your daily energy usage. This will help you determine the size of your solar panel system.
- Choose the right solar panels: Select solar panels that meet your energy needs and are compatible with your system.
- Decide on the system configuration: You can choose from a grid-tie system, off-grid system, or a hybrid system. Each system has its own wiring requirements, so make sure you understand the differences.
Step 2: Prepare the Solar Panels
Once you have planned your system, it’s time to prepare the solar panels for wiring. Here are the steps:
- Connect the solar panel connectors: Most solar panels come with connectors that are used to connect the panels to each other. Make sure the connectors are securely attached to the panels.
- Check the polarity: Ensure that the polarity of the solar panels is correct. The positive terminal of one panel should be connected to the negative terminal of the next panel.
- Clean the solar panels: Clean the solar panels to ensure that they are free of dirt and debris, which can affect their performance.
Step 3: Connect the Solar Panels in Series
To connect the solar panels in series, follow these steps:
- Connect the positive terminal of the first panel to the negative terminal of the second panel: Use a wiring connector to connect the positive terminal of the first panel to the negative terminal of the second panel.
- Continue connecting the panels in series: Continue connecting the panels in series, making sure to connect the positive terminal of one panel to the negative terminal of the next panel.
- Use a series wiring connector: Use a series wiring connector to connect the panels together. This type of connector is designed to handle the high voltage and current of the solar panels.
Step 4: Connect the Solar Panels in Parallel
To connect the solar panels in parallel, follow these steps:
- Connect the positive terminals of the panels together: Use a wiring connector to connect the positive terminals of the panels together.
- Connect the negative terminals of the panels together: Use a wiring connector to connect the negative terminals of the panels together.
- Use a parallel wiring connector: Use a parallel wiring connector to connect the panels together. This type of connector is designed to handle the high current of the solar panels.
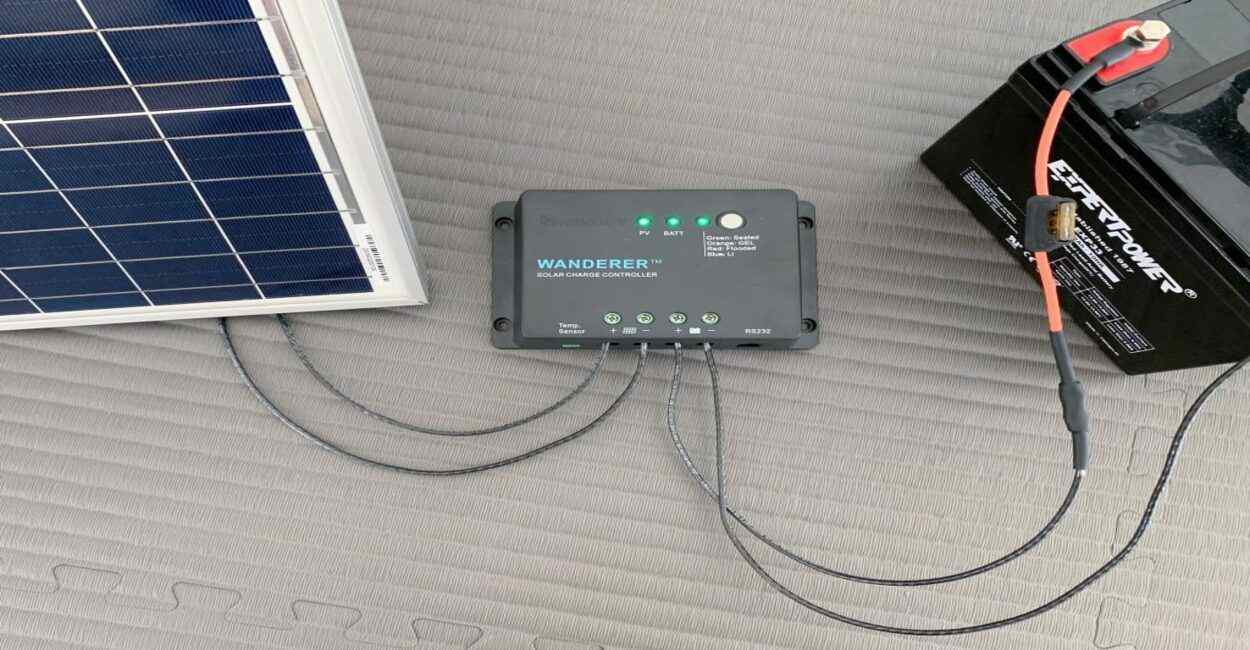
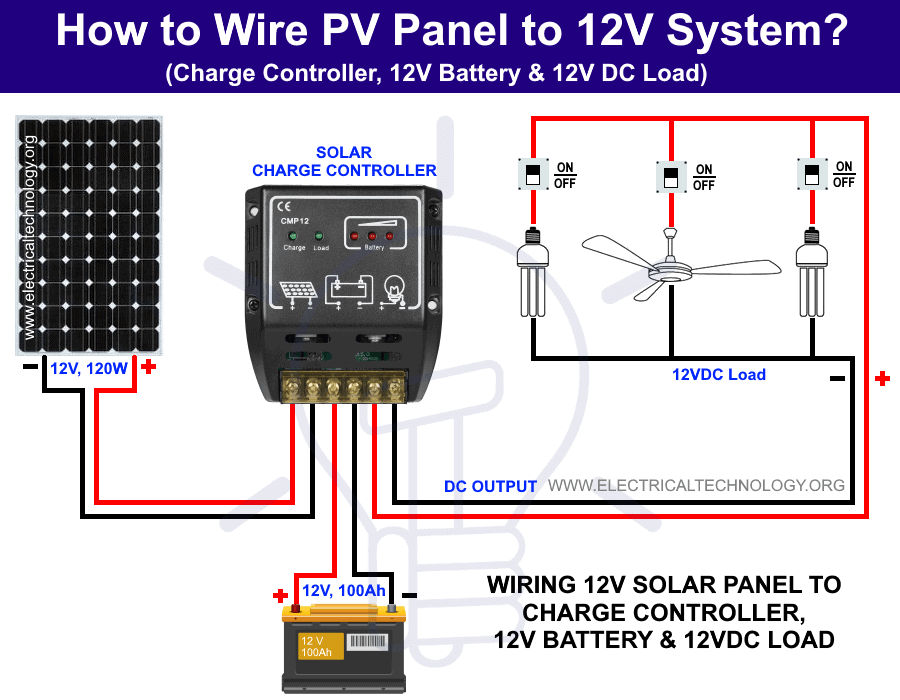
Step 5: Connect the Solar Panel Array to the Charge Controller
Once you have connected the solar panels in series or parallel, it’s time to connect the solar panel array to the charge controller. Here are the steps:
- Connect the positive terminal of the solar panel array to the positive terminal of the charge controller: Use a wiring connector to connect the positive terminal of the solar panel array to the positive terminal of the charge controller.
- Connect the negative terminal of the solar panel array to the negative terminal of the charge controller: Use a wiring connector to connect the negative terminal of the solar panel array to the negative terminal of the charge controller.
- Set the charge controller settings: Set the charge controller settings according to the manufacturer’s instructions.
Step 6: Connect the Charge Controller to the Battery Bank
Once you have connected the solar panel array to the charge controller, it’s time to connect the charge controller to the battery bank. Here are the steps:
- Connect the positive terminal of the charge controller to the positive terminal of the battery bank: Use a wiring connector to connect the positive terminal of the charge controller to the positive terminal of the battery bank.
- Connect the negative terminal of the charge controller to the negative terminal of the battery bank: Use a wiring connector to connect the negative terminal of the charge controller to the negative terminal of the battery bank.
- Set the battery bank settings: Set the battery bank settings according to the manufacturer’s instructions.
Step 7: Connect the Battery Bank to the Inverter
Once you have connected the charge controller to the battery bank, it’s time to connect the battery bank to the inverter. Here are the steps:
- Connect the positive terminal of the battery bank to the positive terminal of the inverter: Use a wiring connector to connect the positive terminal of the battery bank to the positive terminal of the inverter.
- Connect the negative terminal of the battery bank to the negative terminal of the inverter: Use a wiring connector to connect the negative terminal of the battery bank to the negative terminal of the inverter.
- Set the inverter settings: Set the inverter settings according to the manufacturer’s instructions.
Step 8: Test the System
Once you have connected all the components, it’s time to test the system. Here are the steps:
- Check the voltage and current: Use a multimeter to check the voltage and current of the system.
- Check the battery bank state of charge: Use a battery monitor to check the state of charge of the battery bank.
- Check the inverter output: Use a multimeter to check the output of the inverter.
Conclusion
Wiring solar panels for your home can seem like a daunting task, but with the right guidance, it can be a straightforward process. By following the steps outlined in this article, you can ensure that your solar panel system is properly wired and functioning correctly. Remember to always follow safety guidelines and consult the manufacturer’s instructions for specific components. With a well-designed and properly installed solar panel system, you can enjoy the benefits of renewable energy and reduce your reliance on traditional energy sources.


