“What are the steps to wire solar panels, inverter, and battery for a home system?”
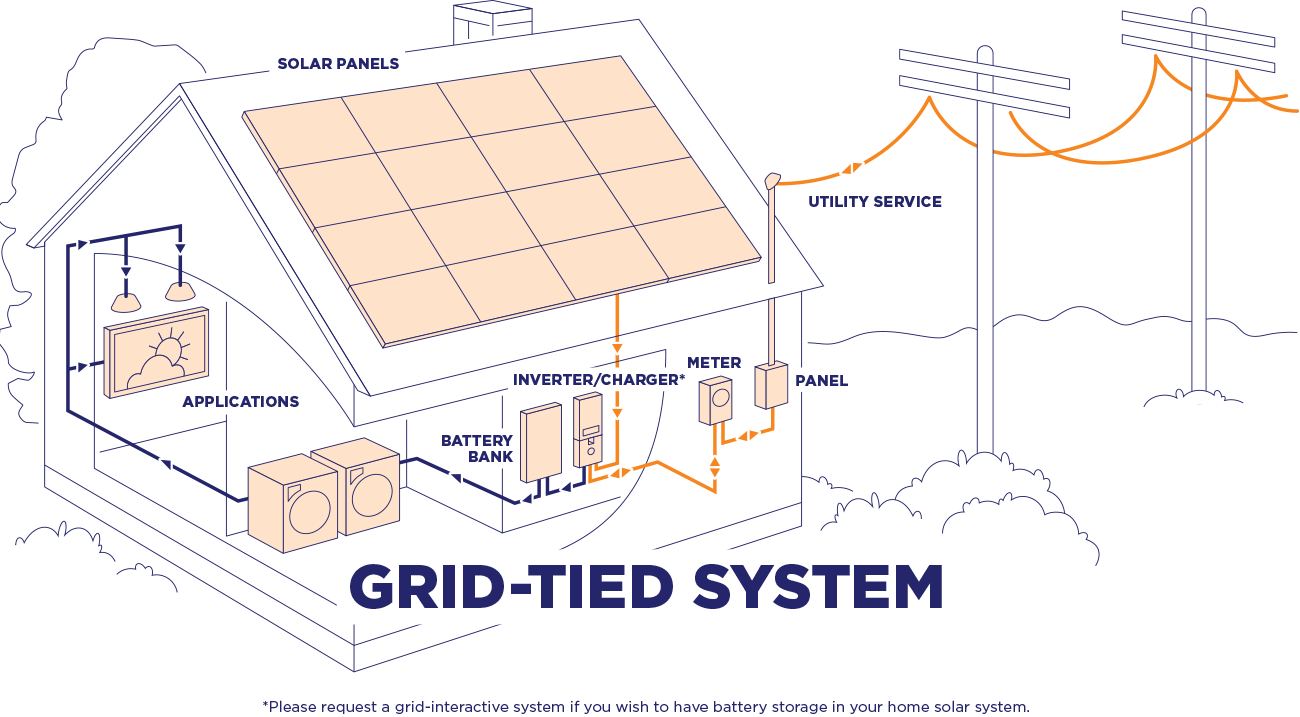
A home solar system typically consists of solar panels, an inverter, and a battery, all working together to harness and store energy from the sun. However, wiring these components requires careful planning and execution to ensure a safe and efficient system. In this article, we will walk you through the steps to wire solar panels, an inverter, and a battery for a home system.
Understanding the Components
Before we dive into the wiring process, it’s essential to understand the role of each component in the system:
- Solar Panels: These are the photovoltaic (PV) panels that convert sunlight into direct current (DC) electricity.
- Inverter: This device converts the DC electricity from the solar panels into alternating current (AC) electricity, which is usable in the home.
- Battery: This component stores excess energy generated by the solar panels during the day for use at night or during power outages.
Pre-Wiring Preparations
Before starting the wiring process, make sure you have:
- A thorough understanding of electrical systems: It’s crucial to have a basic knowledge of electrical systems, including voltage, current, and resistance.
- The necessary tools and materials: You’ll need a range of tools, including wire strippers, pliers, and a multimeter, as well as materials like copper wire, connectors, and fuses.
- A well-designed system plan: Create a detailed plan of your system, including the layout of the solar panels, inverter, and battery, as well as the wiring routes.
- Compliance with local electrical codes: Ensure that your system meets local electrical codes and regulations.

Step 1: Wiring the Solar Panels
To wire the solar panels, follow these steps:
- Connect the solar panels in series: If you have multiple solar panels, connect them in series to increase the voltage. Use MC4 connectors to connect the positive terminal of one panel to the negative terminal of the next panel.
- Connect the solar panels in parallel: If you want to increase the current, connect the solar panels in parallel. Use a junction box to connect the positive and negative terminals of each panel.
- Use a combiner box: If you have multiple strings of solar panels, use a combiner box to combine the positive and negative terminals of each string.
- Ground the solar panels: Connect the negative terminal of the solar panel array to a grounding system, such as a grounding rod or a grounding plate.
Step 2: Wiring the Inverter
To wire the inverter, follow these steps:
- Connect the inverter to the solar panel array: Use a DC wire to connect the positive and negative terminals of the solar panel array to the inverter’s DC input terminals.
- Connect the inverter to the grid: Use an AC wire to connect the inverter’s AC output terminals to the grid, either through a main panel or a sub-panel.
- Connect the inverter to the battery: If you have a battery-based system, use a DC wire to connect the inverter’s DC output terminals to the battery’s input terminals.
- Configure the inverter settings: Configure the inverter settings, including the voltage, frequency, and power output.
Step 3: Wiring the Battery
To wire the battery, follow these steps:
- Connect the battery to the inverter: Use a DC wire to connect the battery’s input terminals to the inverter’s DC output terminals.
- Connect the battery to the charge controller: If you have a charge controller, use a DC wire to connect the battery’s input terminals to the charge controller’s output terminals.
- Ground the battery: Connect the negative terminal of the battery to a grounding system, such as a grounding rod or a grounding plate.
- Configure the battery settings: Configure the battery settings, including the state of charge, voltage, and capacity.
Step 4: Wiring the Load Center
To wire the load center, follow these steps:
- Connect the inverter to the load center: Use an AC wire to connect the inverter’s AC output terminals to the load center’s input terminals.
- Connect the battery to the load center: If you have a battery-based system, use an AC wire to connect the battery’s output terminals to the load center’s input terminals.
- Connect the loads to the load center: Use AC wires to connect the loads, such as lights, appliances, and outlets, to the load center’s output terminals.
- Configure the load center settings: Configure the load center settings, including the voltage, frequency, and power output.
Step 5: Testing and Commissioning
Once the wiring is complete, it’s essential to test and commission the system to ensure it’s working safely and efficiently:
- Test the voltage and current: Use a multimeter to test the voltage and current output of the solar panel array, inverter, and battery.
- Test the power output: Use a power meter to test the power output of the inverter and battery.
- Test the system under load: Test the system under load to ensure it’s working efficiently and safely.
- Configure the system monitoring: Configure the system monitoring, including the data logging and alarm settings.
Safety Precautions
When wiring a solar panel system, it’s essential to take safety precautions to avoid electrical shock, fire, and other hazards:
- Use personal protective equipment: Use personal protective equipment, such as gloves, safety glasses, and a hard hat, when working with electrical systems.
- Ensure proper grounding: Ensure proper grounding of the system to prevent electrical shock.
- Use proper wiring techniques: Use proper wiring techniques, including stripping, twisting, and soldering, to prevent electrical shock and fire.
- Follow local electrical codes: Follow local electrical codes and regulations to ensure a safe and compliant system.
Conclusion
Wiring a solar panel system requires careful planning, execution, and attention to safety precautions. By following the steps outlined in this article, you can ensure a safe and efficient system that provides reliable power for your home. Remember to always follow local electrical codes and regulations, and consult a professional if you’re unsure about any aspect of the wiring process. With a well-designed and properly installed solar panel system, you can enjoy the benefits of renewable energy and reduce your carbon footprint for years to come.