“DIY RV solar system wiring instructions”
Installing a solar system on your RV can seem like a daunting task, but with the right instructions, you can do it yourself and enjoy the benefits of renewable energy. In this article, we will provide you with a step-by-step guide on how to wire your RV solar system.
Understanding the Basics
Before we dive into the wiring instructions, it’s essential to understand the basics of a solar system. A typical RV solar system consists of:
- Solar Panels: These are the panels that convert sunlight into electrical energy.
- Charge Controller: This device regulates the flow of energy from the solar panels to the battery.
- Battery: This is where the energy generated by the solar panels is stored.
- Inverter: This device converts the DC power from the battery into AC power, which is used to power your RV’s appliances.
- Wiring: This connects all the components together and allows the energy to flow.
Tools and Materials Needed
To wire your RV solar system, you will need the following tools and materials:
- Solar panels
- Charge controller
- Battery
- Inverter
- Wiring (12 AWG or 10 AWG)
- Connectors (MC4 or similar)
- Fuses (optional)
- Electrical tape
- Wire strippers
- Pliers
- Screwdrivers
Step 1: Plan Your System
Before you start wiring, it’s crucial to plan your system. Determine how much energy you need to generate and how much storage you require. Consider the following factors:
- The size of your RV
- The number of appliances you want to power
- The amount of time you spend in your RV
- The climate and sunlight hours in your area
Use online solar system calculators or consult with a professional to determine the size of your solar array, battery bank, and inverter.
Step 2: Install the Solar Panels
Mount the solar panels on your RV’s roof, making sure they are securely fastened and facing the correct direction (south-facing for maximum sunlight). Connect the panels in series or parallel, depending on your system design. Use MC4 connectors to connect the panels to the charge controller.
Step 3: Install the Charge Controller
Mount the charge controller in a dry, cool area, such as a storage compartment or under the RV’s floor. Connect the solar panel array to the charge controller using MC4 connectors. Make sure the charge controller is set to the correct voltage and charging mode (e.g., bulk, absorb, float).
Step 4: Install the Battery
Mount the battery in a dry, cool area, such as a storage compartment or under the RV’s floor. Connect the battery to the charge controller using 12 AWG or 10 AWG wiring. Make sure the battery is properly vented and secured.
Step 5: Install the Inverter
Mount the inverter in a dry, cool area, such as a storage compartment or under the RV’s floor. Connect the battery to the inverter using 12 AWG or 10 AWG wiring. Make sure the inverter is set to the correct voltage and frequency (e.g., 120V, 60Hz).
Step 6: Wire the System
Connect the solar panel array to the charge controller, and then connect the charge controller to the battery. Connect the battery to the inverter, and then connect the inverter to your RV’s electrical panel. Use 12 AWG or 10 AWG wiring for all connections.
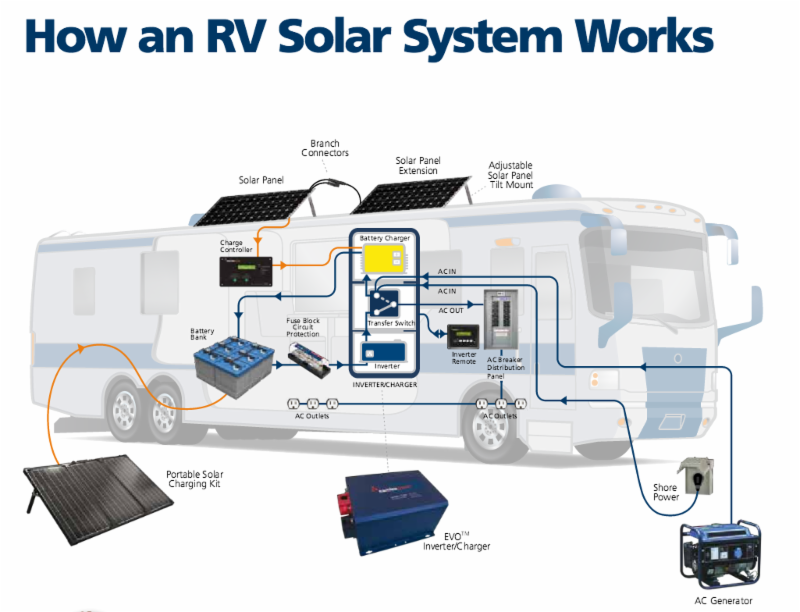
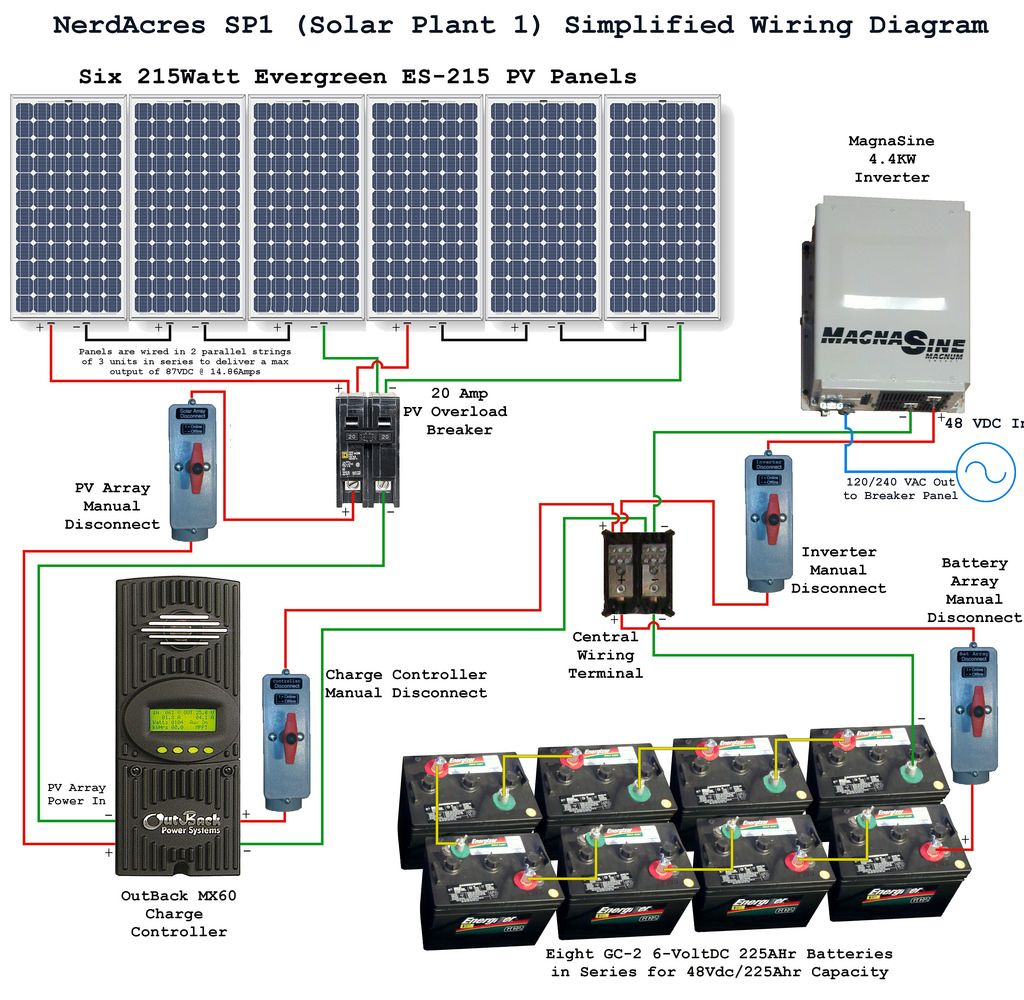
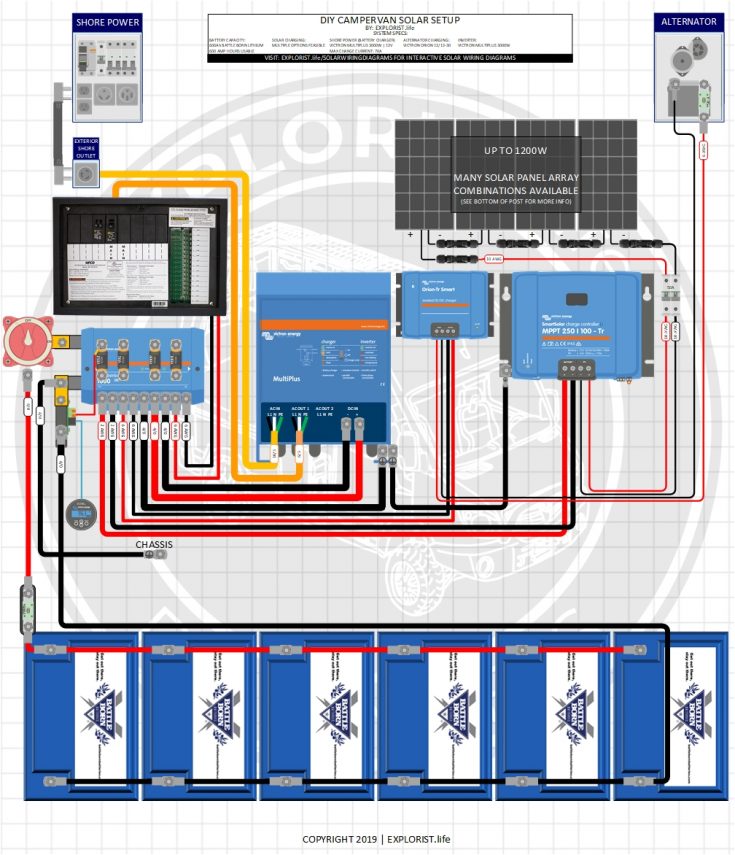
Wiring Diagram
Here is a basic wiring diagram for an RV solar system:
Solar Panels --> MC4 Connectors --> Charge Controller --> Battery --> Inverter --> Electrical PanelStep 7: Add Fuses and Protection
Add fuses to protect your system from overcurrent and short circuits. Install fuses between the solar panel array and the charge controller, and between the battery and the inverter. Use electrical tape to secure the wiring and connectors.
Step 8: Test the System
Turn on the solar panel array and check the charge controller’s display to ensure it’s functioning correctly. Check the battery voltage and state of charge. Turn on the inverter and check the output voltage and frequency. Test your RV’s appliances to ensure they’re working correctly.
Safety Precautions
When working with electrical systems, it’s essential to take safety precautions:
- Wear protective gear, such as gloves and safety glasses
- Use a multimeter to test for voltage and polarity
- Avoid short circuits and overcurrent
- Keep the system away from children and pets
- Follow the manufacturer’s instructions for each component
Troubleshooting
If you encounter any issues with your solar system, check the following:
- Solar panel array: Ensure the panels are clean and free of debris.
- Charge controller: Check the display for error codes or alarms.
- Battery: Check the voltage and state of charge.
- Inverter: Check the output voltage and frequency.
- Wiring: Check for loose connections or damage.
Conclusion
Installing a solar system on your RV can be a rewarding DIY project. By following these instructions and taking the necessary safety precautions, you can enjoy the benefits of renewable energy and reduce your carbon footprint. Remember to plan your system carefully, use high-quality components, and test your system thoroughly to ensure it’s functioning correctly. Happy camping and enjoying the sun!
Additional Tips and Recommendations
- Monitor your system’s performance regularly to optimize energy production and storage.
- Consider adding a backup generator or shore power connection for cloudy days or high energy demand.
- Use energy-efficient appliances and lighting to minimize energy consumption.
- Keep your solar panels clean and well-maintained to ensure maximum energy production.
- Consider upgrading to a larger solar array or battery bank if you find you need more energy storage or generation.
By following these instructions and tips, you can create a reliable and efficient RV solar system that meets your energy needs and reduces your environmental impact.