“12V camper solar wiring schematic”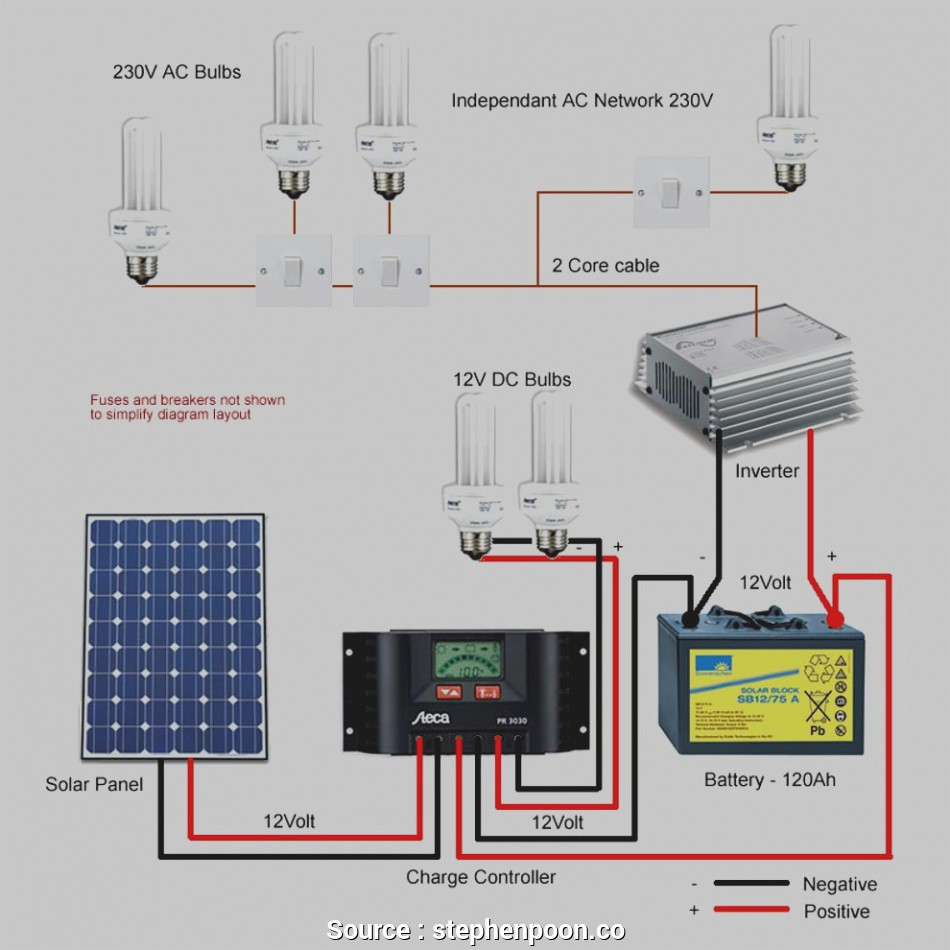
A well-designed 12V camper solar wiring schematic is essential for a reliable and efficient solar power system. In this article, we will delve into the world of 12V camper solar wiring, exploring the key components, wiring diagrams, and best practices for a successful installation.
Introduction to 12V Camper Solar Wiring
A 12V camper solar wiring system is designed to charge a deep cycle battery using solar panels, which then powers the camper’s electrical systems. The 12V system is the most common voltage used in campers and RVs, as it is relatively safe and easy to work with. The solar wiring schematic is the blueprint for the entire system, outlining the connections between the solar panels, charge controller, battery, and electrical loads.
Key Components of a 12V Camper Solar Wiring Schematic
- Solar Panels: These are the primary source of energy for the system, converting sunlight into electrical energy. The number and size of solar panels depend on the camper’s energy requirements and the available roof space.
- Charge Controller: This critical component regulates the flow of energy from the solar panels to the battery, preventing overcharging and ensuring safe and efficient charging.
- Deep Cycle Battery: This battery is designed to provide a steady flow of energy over a long period, making it ideal for camper applications. The battery capacity depends on the camper’s energy requirements and the desired autonomy.
- DC-DC Converter: This component converts the 12V DC power from the battery to a higher voltage, typically 24V or 48V, to power appliances such as refrigerators and air conditioners.
- Electrical Loads: These include appliances, lights, and other devices that draw power from the battery.
Wiring Diagrams and Schematics
A 12V camper solar wiring schematic typically consists of the following components:
- Solar Panel Array: The solar panels are connected in series and/or parallel to achieve the desired voltage and current output.
- Charge Controller Input: The solar panel array is connected to the charge controller, which regulates the energy flow to the battery.
- Battery Connection: The charge controller is connected to the deep cycle battery, which stores excess energy for later use.
- DC-DC Converter Input: The battery is connected to the DC-DC converter, which converts the 12V DC power to a higher voltage.
- Electrical Load Connection: The DC-DC converter output is connected to the electrical loads, such as appliances and lights.
Best Practices for 12V Camper Solar Wiring

- Use Proper Wire Sizing: Ensure that the wire sizes are adequate for the current flowing through them, to prevent overheating and energy losses.
- Keep Wiring Runs Short: Minimize the length of wiring runs to reduce energy losses and improve system efficiency.
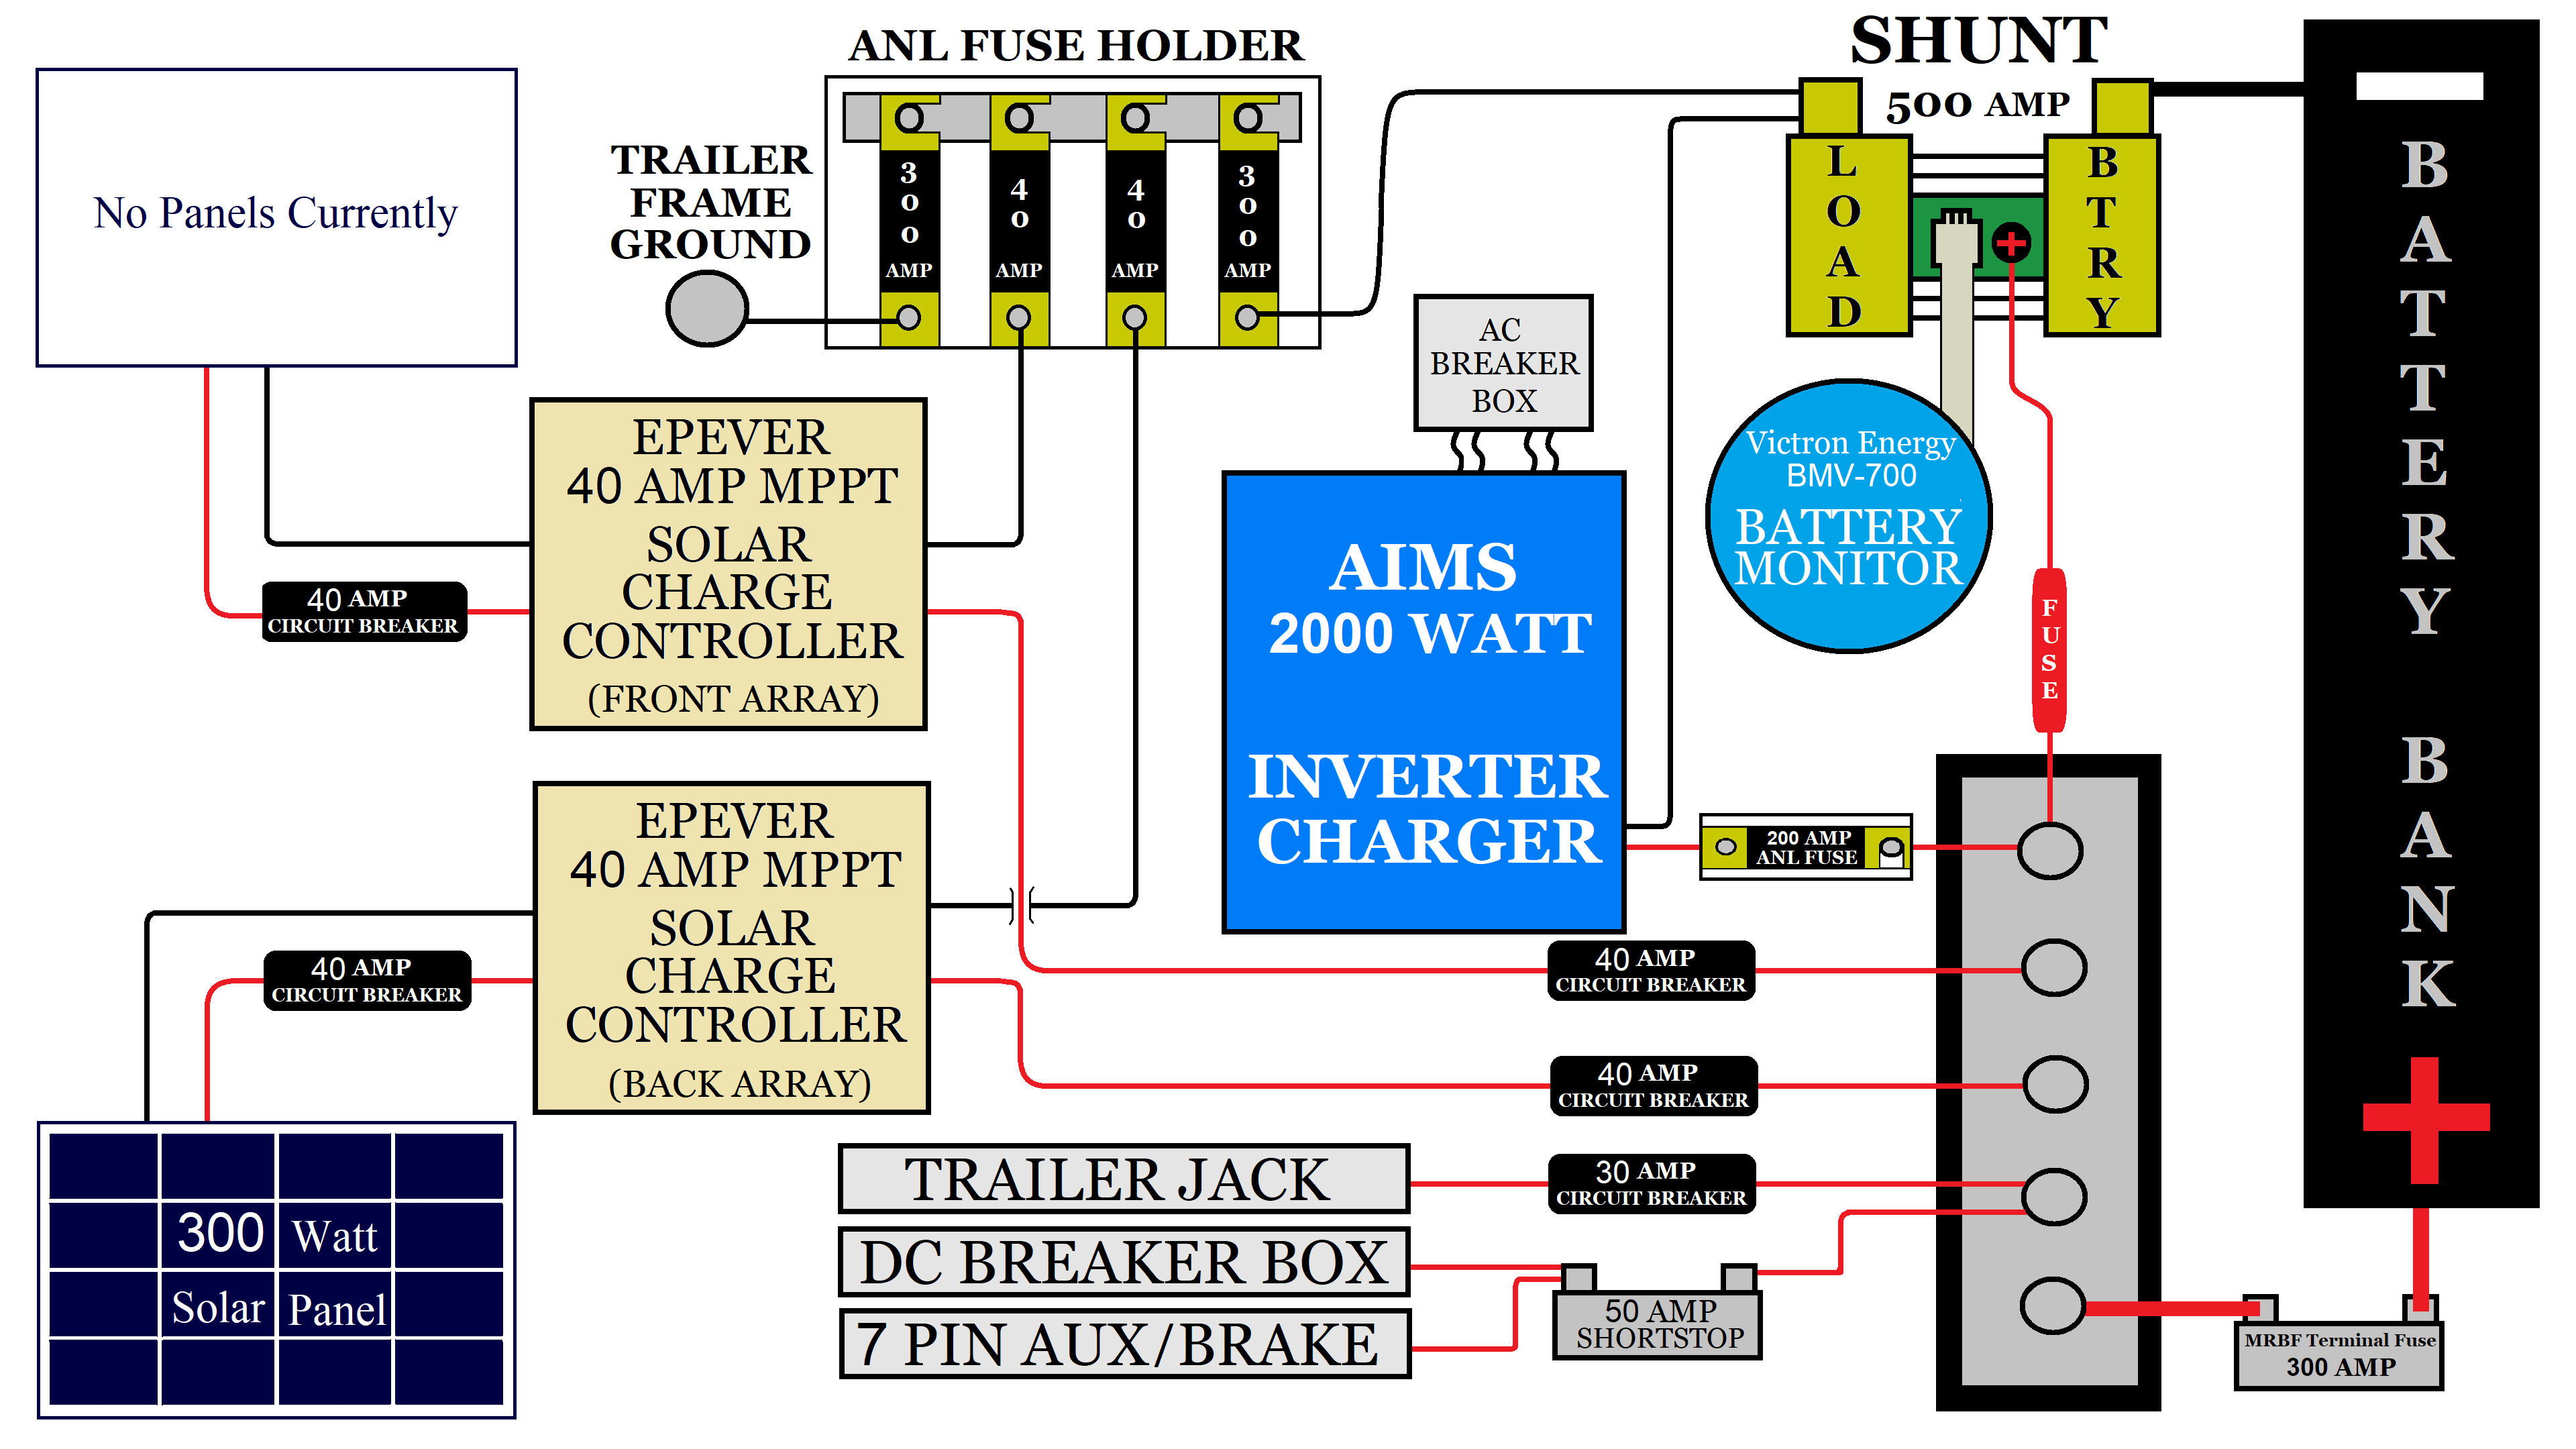
- Use Fuses and Circuit Breakers: Protect the system from overcurrent conditions and electrical faults by using fuses and circuit breakers.
- Grounding and Bonding: Ensure that all components are properly grounded and bonded to prevent electrical shocks and system malfunctions.
- Monitor System Performance: Install a monitoring system to track the performance of the solar power system, including voltage, current, and energy production.
Typical 12V Camper Solar Wiring Schematic
Here is a simplified example of a 12V camper solar wiring schematic:
- Solar Panel Array: 2 x 200W solar panels in parallel (400W total)
- Charge Controller: 40A MPPT charge controller
- Battery: 200Ah deep cycle battery
- DC-DC Converter: 24V DC-DC converter
- Electrical Loads: 24V refrigerator, 12V lights, and 12V water pump
Wiring Diagram:
- Solar Panel Array → Charge Controller Input
- Charge Controller Output → Battery Connection
- Battery Connection → DC-DC Converter Input
- DC-DC Converter Output → Electrical Load Connection
System Considerations
- Energy Requirements: Calculate the camper’s energy requirements, including the power consumption of all appliances and devices.
- Solar Panel Sizing: Determine the required solar panel size and configuration based on the energy requirements and available roof space.
- Battery Sizing: Calculate the required battery capacity based on the energy requirements and desired autonomy.
- System Voltage: Ensure that the system voltage is compatible with all components, including the charge controller, battery, and electrical loads.
- Safety Considerations: Implement safety features, such as fuses, circuit breakers, and grounding, to prevent electrical shocks and system malfunctions.
Conclusion
A 12V camper solar wiring schematic is a critical component of a solar power system, outlining the connections between the solar panels, charge controller, battery, and electrical loads. By following best practices, using proper wire sizing, and considering system requirements, you can create a reliable and efficient solar power system for your camper. Remember to always consult a professional if you are unsure about any aspect of the installation, and ensure that your system meets all safety and regulatory requirements.
Additional Resources
For further information on 12V camper solar wiring schematics, we recommend consulting the following resources:
- National Electric Code (NEC) guidelines for solar power systems
- Manufacturer documentation for solar panels, charge controllers, and batteries
- Online forums and communities, such as Reddit’s r/solarpower and r/camperlife
- Professional solar installers and electricians
By following these guidelines and resources, you can create a safe and efficient 12V camper solar wiring schematic, powering your adventures for years to come.


