“12V solar panel wiring diagram for RV”
However, one of the biggest challenges RVers face is finding reliable and efficient ways to power their vehicles. This is where solar panels come in – a clean, renewable, and cost-effective solution for generating electricity on the go. In this article, we’ll delve into the world of 12V solar panel wiring diagrams specifically designed for RVs, providing you with a comprehensive understanding of how to harness the power of the sun to fuel your adventures.
Introduction to Solar Panels for RVs
Before we dive into the wiring diagram, it’s essential to understand the basics of solar panels and their application in RVs. Solar panels convert sunlight into electrical energy using photovoltaic (PV) cells. In an RV setup, solar panels are typically installed on the roof or mounted on a portable frame, allowing you to generate power wherever you go. The electricity generated by the solar panels is then stored in deep cycle batteries, which provide a stable DC power source for your RV’s electrical systems.
Understanding 12V Solar Panel Systems
A 12V solar panel system is designed to produce 12 volts of direct current (DC) electricity, which is the standard voltage for most RV electrical systems. This voltage is sufficient to charge deep cycle batteries, power lights, fans, and other DC appliances. When selecting a 12V solar panel system for your RV, consider the following factors:
- Panel wattage: The total wattage of your solar panel array determines how much electricity you can generate. A higher wattage rating means more power, but also increases the cost and size of the panels.
- Voltage: Ensure that your solar panels produce 12V DC output to match your RV’s electrical system.
- Current: The current rating of your solar panels affects how quickly they can charge your batteries.
- Controller: A solar charge controller regulates the flow of energy from the solar panels to the batteries, preventing overcharging and ensuring safe operation.
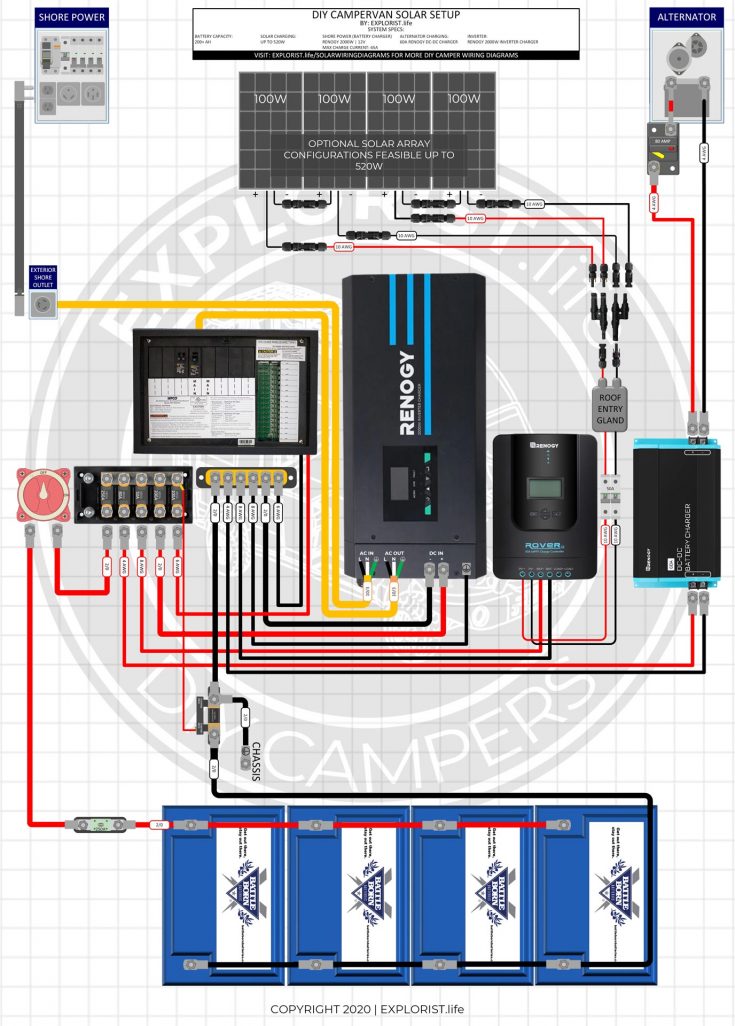
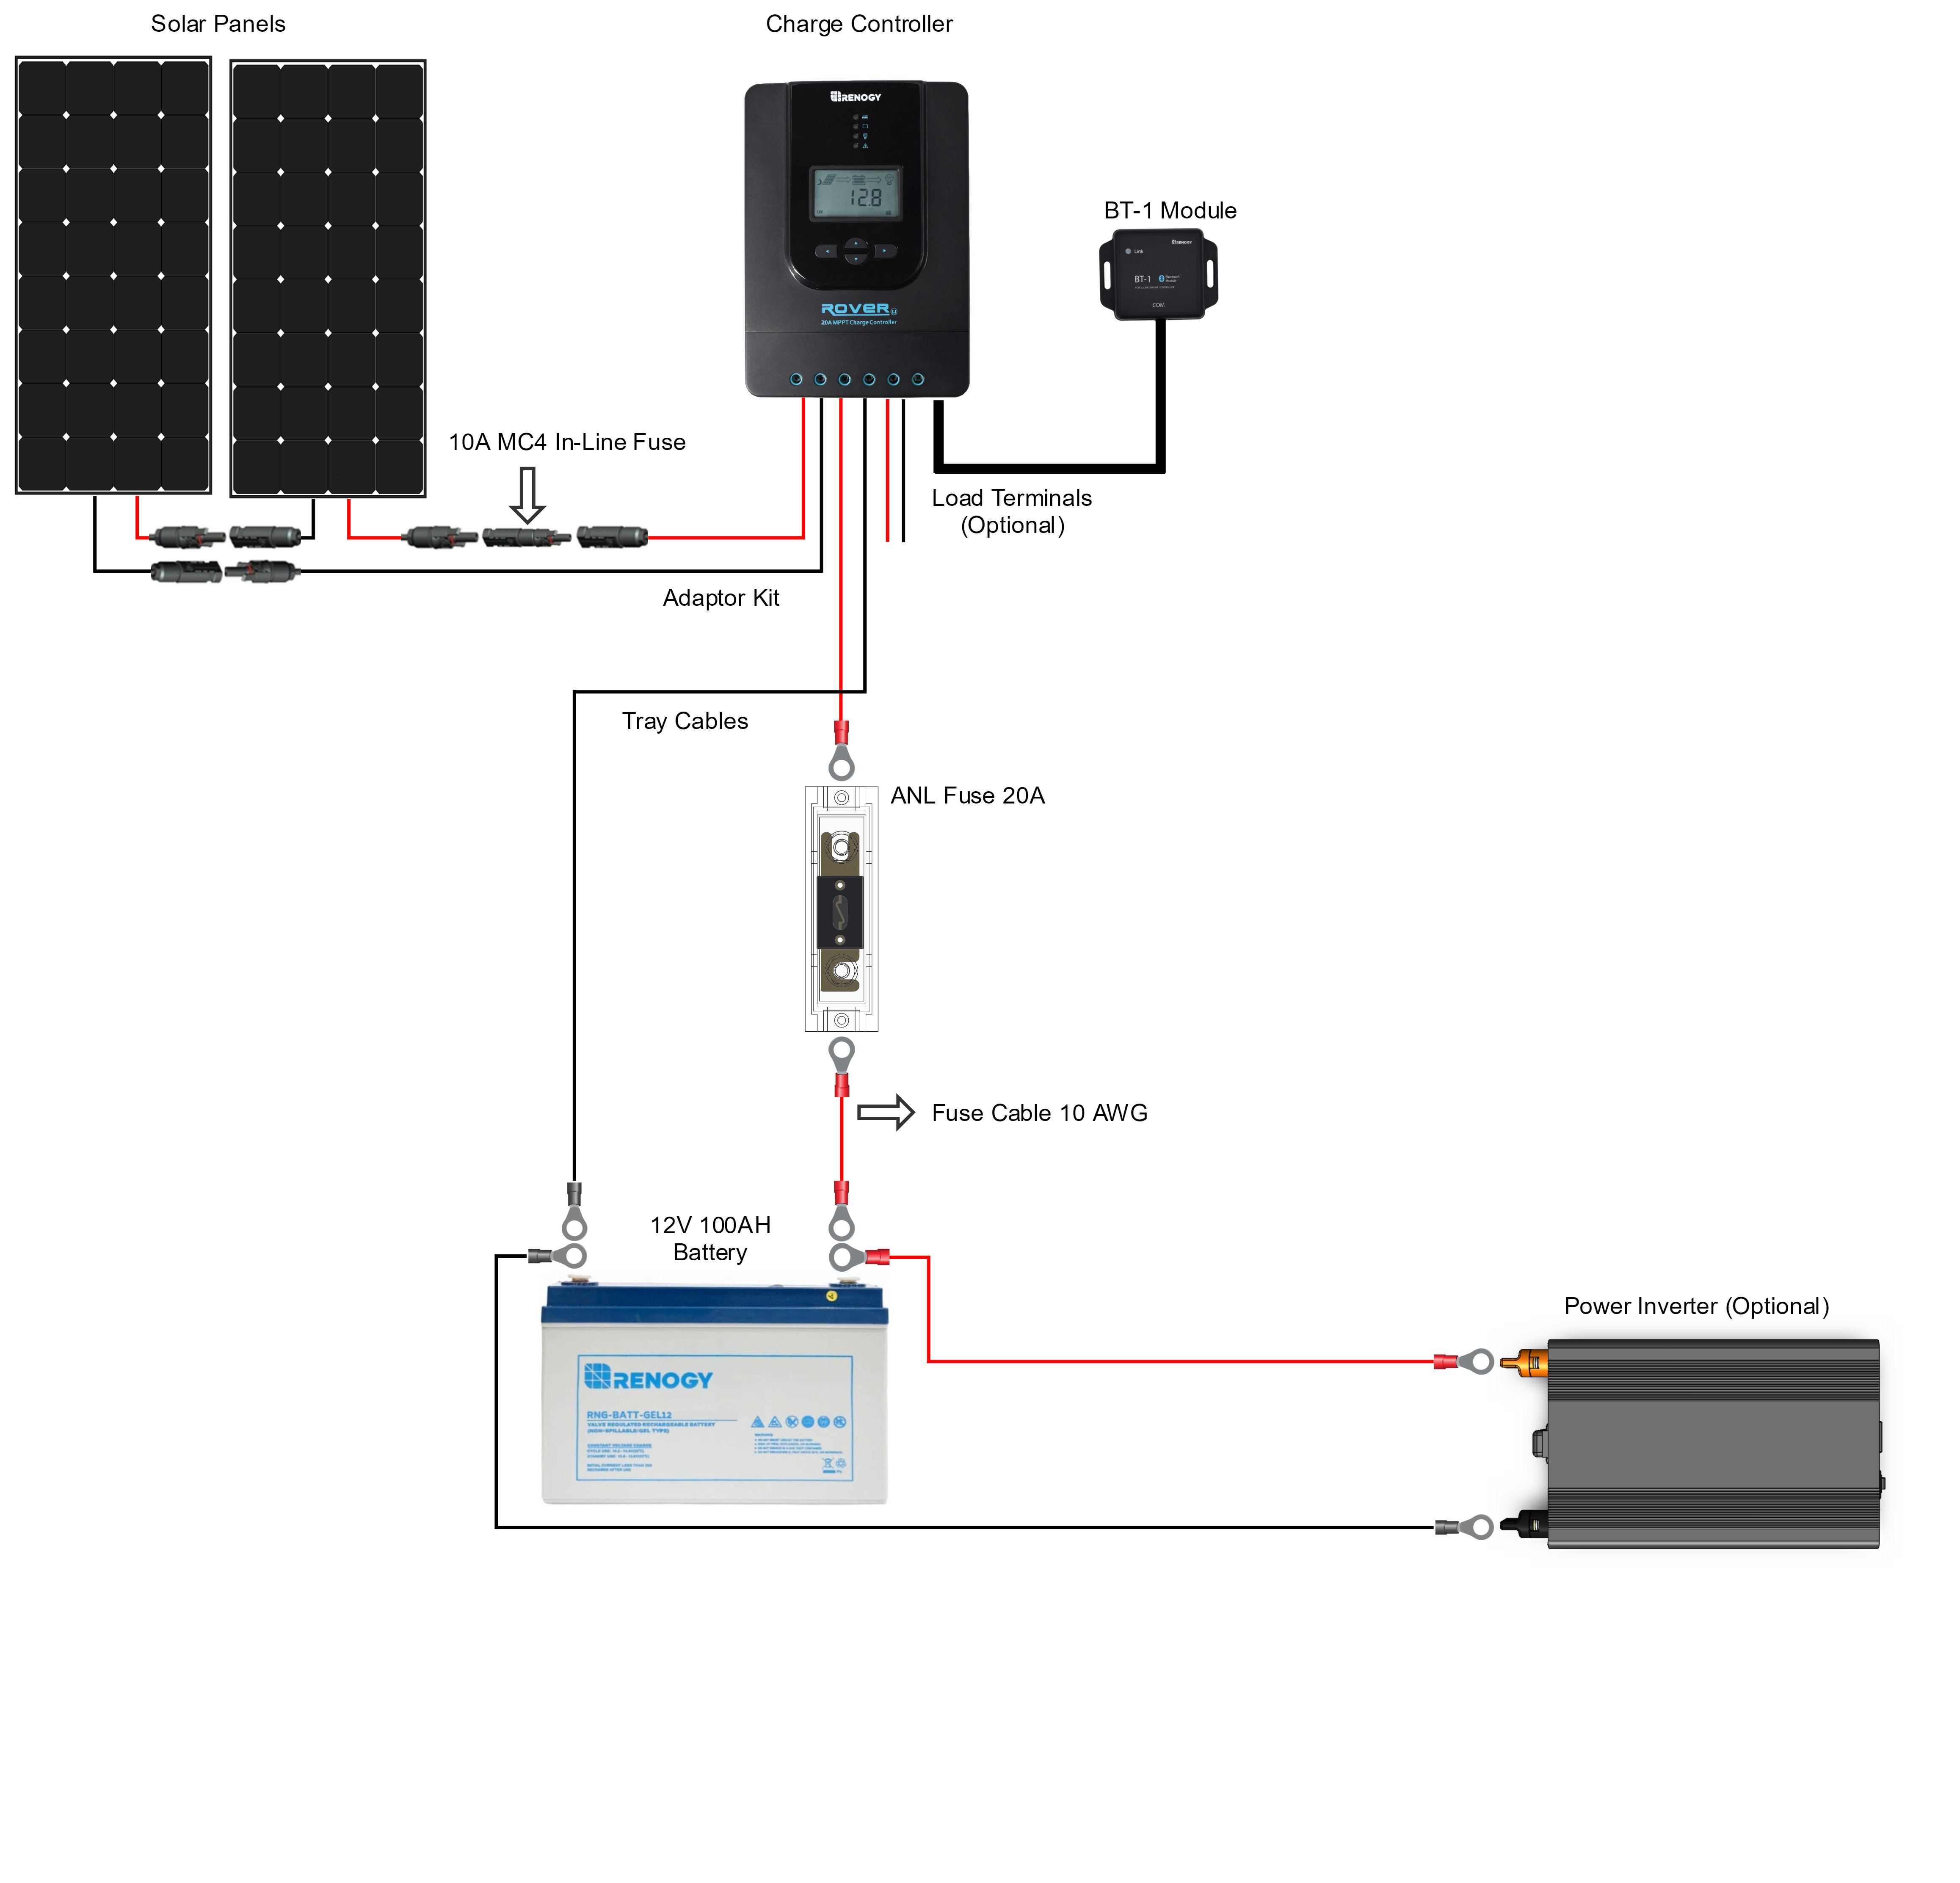
12V Solar Panel Wiring Diagram for RV
A typical 12V solar panel wiring diagram for an RV consists of the following components:
- Solar Panels: The array of solar panels that convert sunlight into electrical energy.
- Solar Charge Controller: Regulates the flow of energy from the solar panels to the batteries.
- Deep Cycle Batteries: Store excess energy generated by the solar panels for later use.
- DC-DC Converter: Converts the 12V DC power from the batteries to a higher voltage (e.g., 120V AC) for powering AC appliances.
- Inverter: Converts the 12V DC power from the batteries to 120V AC power for powering AC appliances.
- Fuses and Circuit Breakers: Protect the electrical system from overloads and short circuits.
- Wiring and Connectors: Connect the various components of the system, ensuring safe and efficient energy transfer.
Wiring Diagram Components
Here’s a detailed breakdown of the components in a 12V solar panel wiring diagram for an RV:
- Solar Panel Array: Connect multiple solar panels in series and/or parallel to achieve the desired voltage and current output.
- Solar Charge Controller:
- Connect the solar panel array to the charge controller’s input terminals.
- Connect the charge controller’s output terminals to the deep cycle batteries.
- Deep Cycle Batteries:
- Connect the batteries in series and/or parallel to achieve the desired voltage and capacity.
- Connect the batteries to the charge controller’s output terminals.
- DC-DC Converter:
- Connect the DC-DC converter to the batteries, ensuring the input voltage matches the converter’s specifications.
- Connect the converter’s output to the inverter or other DC loads.
- Inverter:
- Connect the inverter to the batteries, ensuring the input voltage matches the inverter’s specifications.
- Connect the inverter’s output to the AC loads (e.g., appliances, lighting).
- Fuses and Circuit Breakers:
- Install fuses or circuit breakers between the solar panels, charge controller, batteries, and inverter to protect against overloads and short circuits.
- Wiring and Connectors:
- Use suitable wiring and connectors to connect the various components, ensuring safe and efficient energy transfer.
Best Practices for Wiring and Installation
To ensure a safe and efficient 12V solar panel system, follow these best practices:
- Use proper sizing and rating: Ensure that all components, including wiring, fuses, and circuit breakers, are sized and rated for the system’s voltage and current.
- Keep wiring organized and tidy: Use cable ties, conduit, and labeling to keep wiring organized, reducing the risk of damage or short circuits.
- Use protective devices: Install fuses, circuit breakers, and surge protectors to safeguard against overloads, short circuits, and electrical surges.
- Grounding and bonding: Ensure proper grounding and bonding of the system to prevent electrical shock and ensure safe operation.
- Regular maintenance: Inspect and maintain the system regularly to ensure optimal performance and extend its lifespan.
Conclusion
In conclusion, a 12V solar panel wiring diagram for an RV is a critical component of a reliable and efficient solar power system. By understanding the basics of solar panels, 12V systems, and wiring diagrams, you can design and install a system that meets your energy needs and provides a safe and enjoyable RVing experience. Remember to follow best practices for wiring and installation, and don’t hesitate to consult professionals if you’re unsure about any aspect of the process. With a well-designed and properly installed 12V solar panel system, you’ll be able to harness the power of the sun and enjoy the freedom to explore the great outdoors without worrying about your energy needs.