“What is the best wiring layout for camper solar setup?”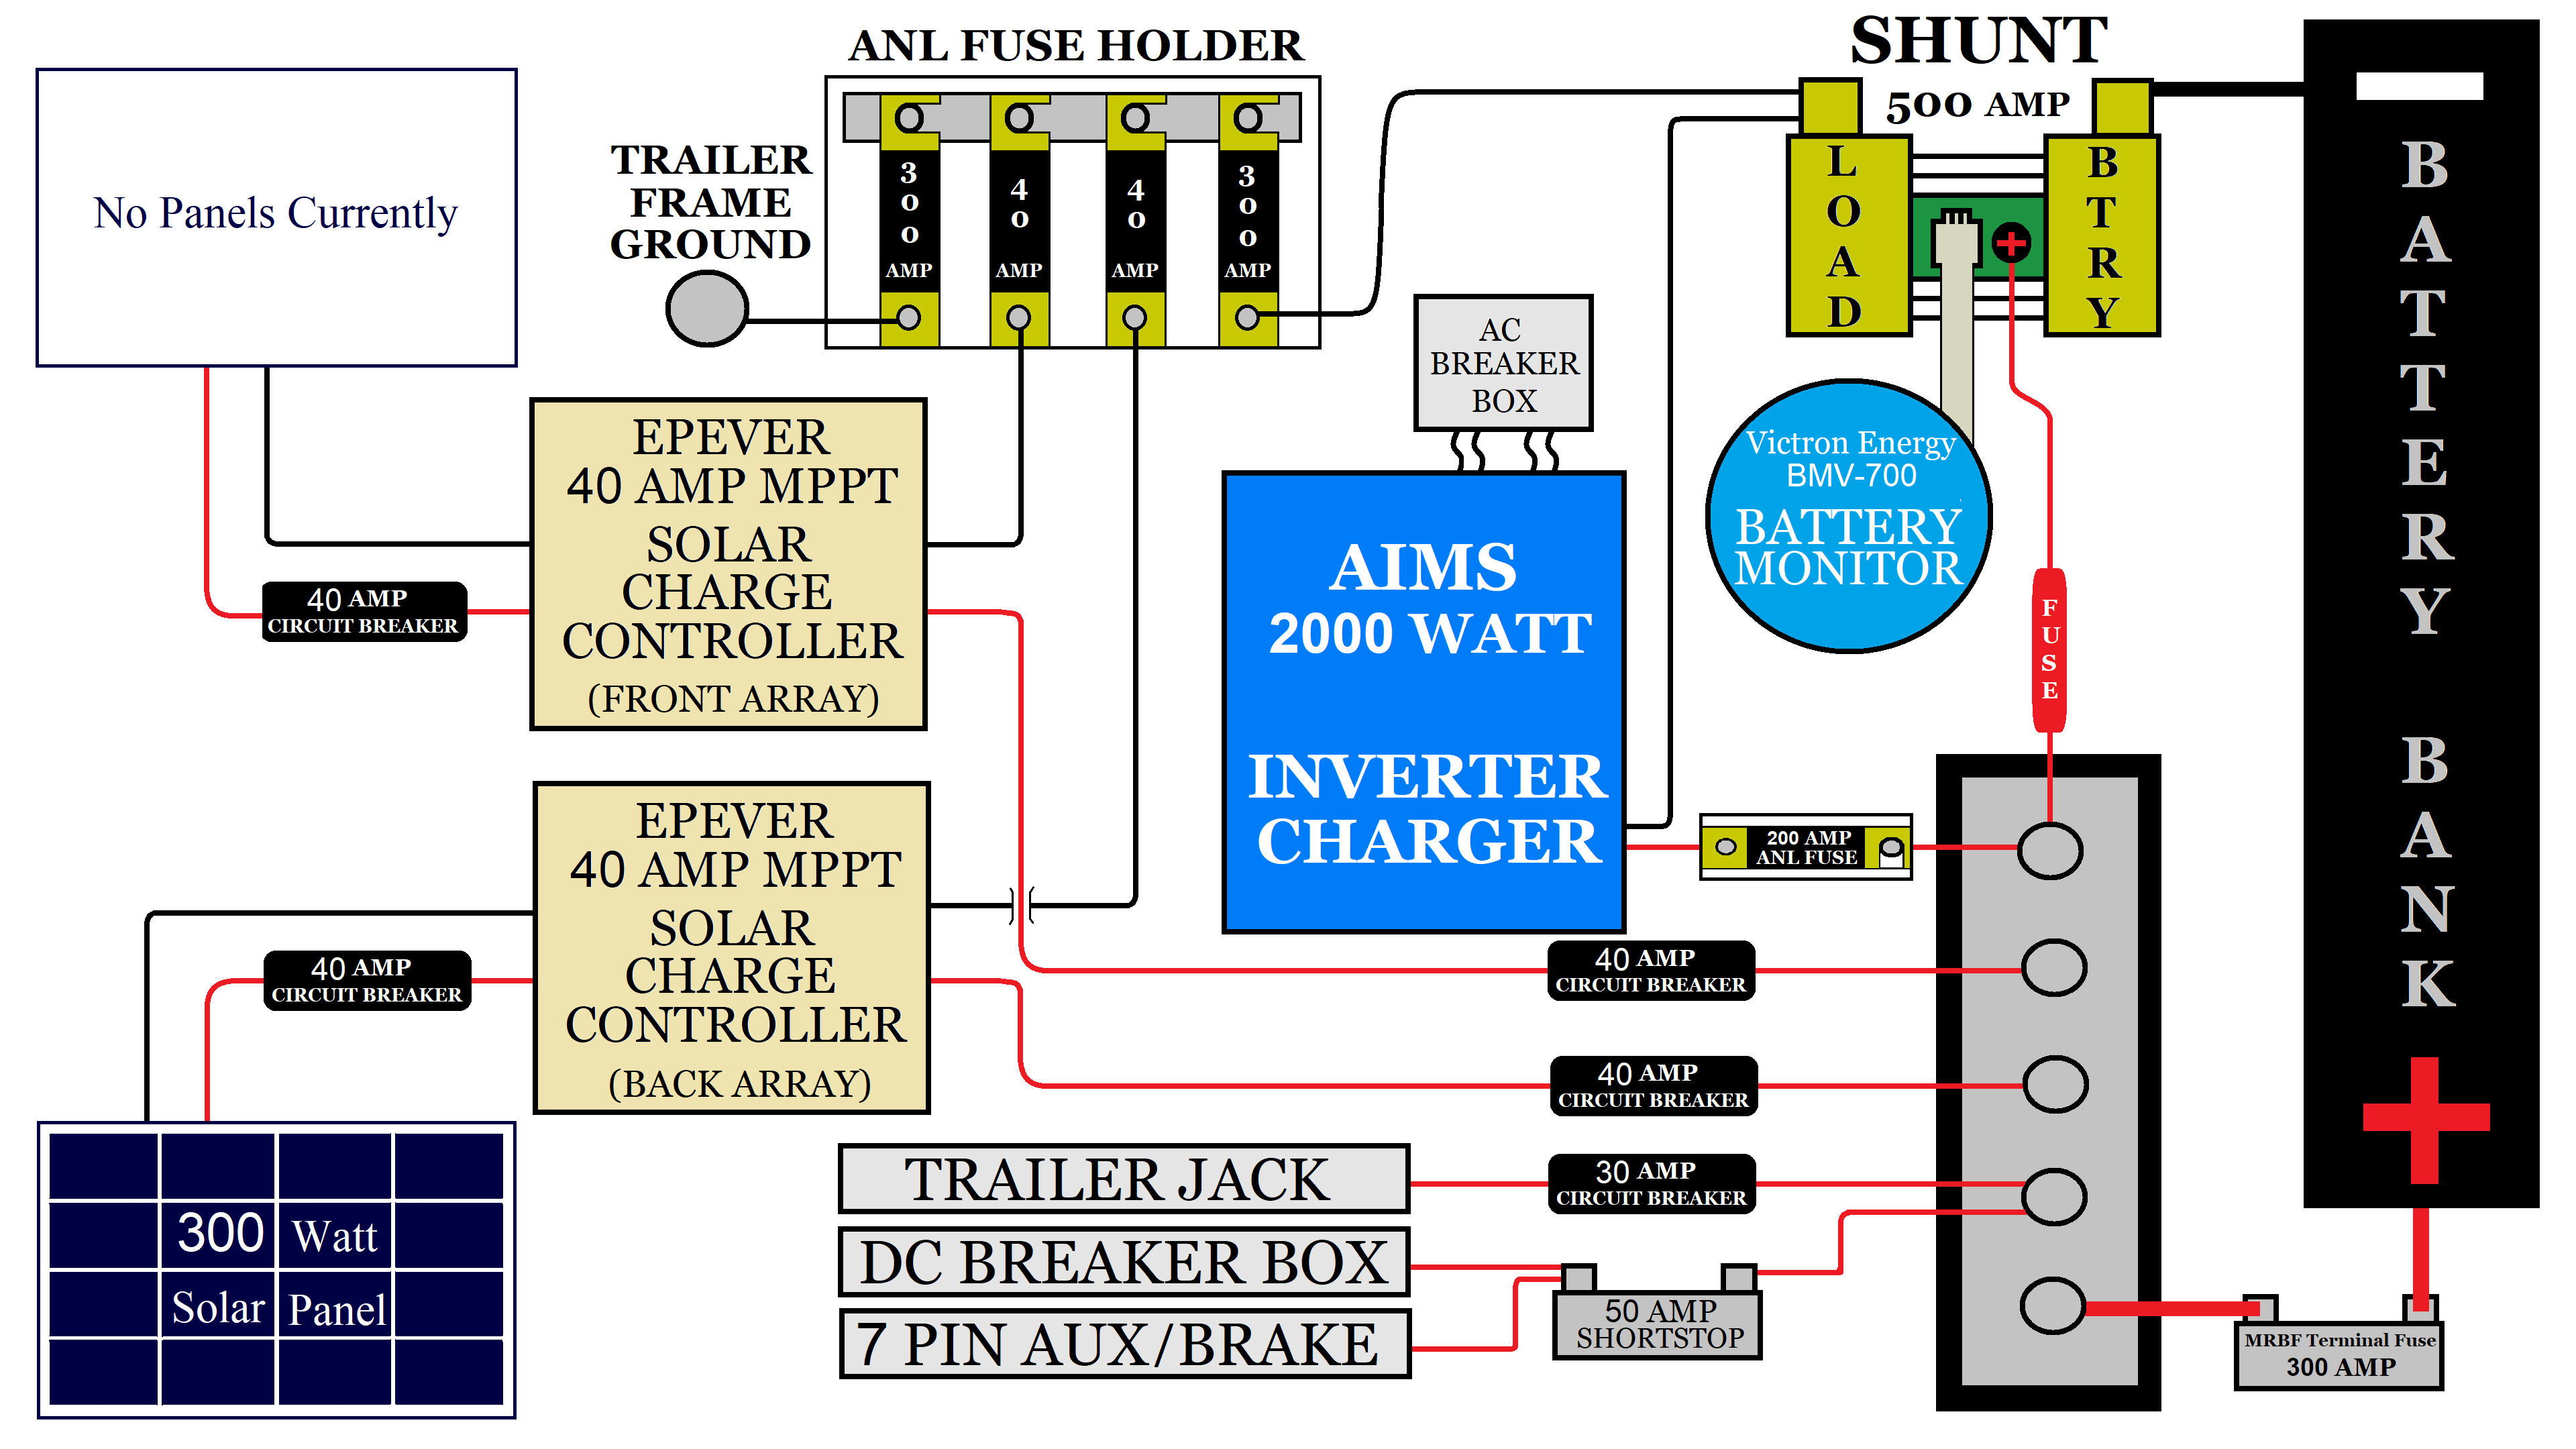
They come in various sizes, wattages, and types, including monocrystalline, polycrystalline, and amorphous.
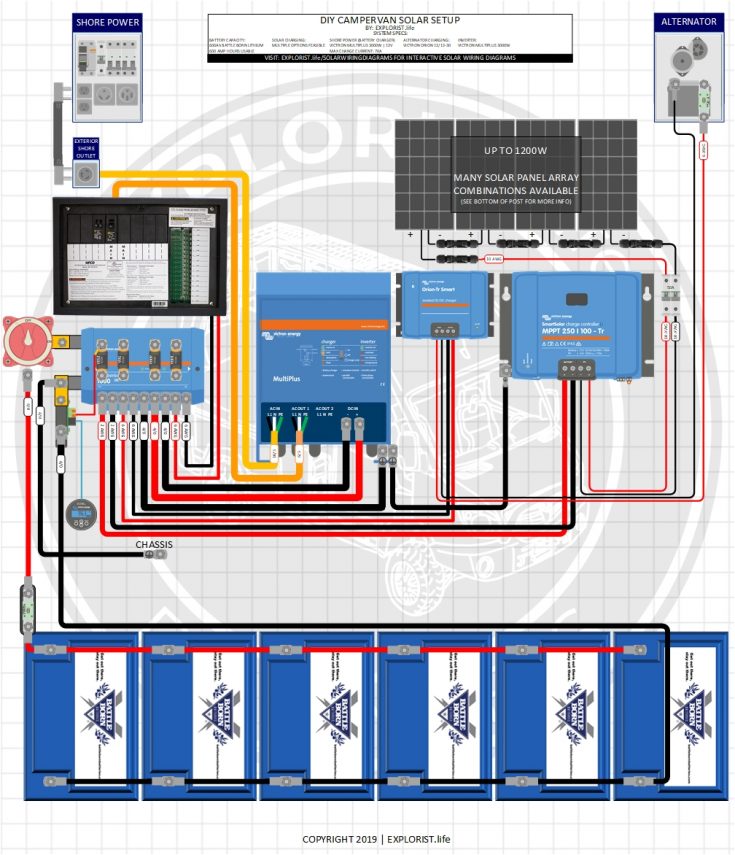
Wiring Layout Options for Camper Solar Setup
When it comes to designing the wiring layout for your camper solar setup, there are several options to consider. The following are some of the most common wiring layouts:
- Series Wiring: This layout involves connecting the solar panels in series, with each panel connected to the next in a single string. This configuration is suitable for smaller systems and can be more efficient, but it can also be more prone to shading issues.
- Parallel Wiring: In this layout, the solar panels are connected in parallel, with each panel having its own dedicated wiring and connector. This configuration is more flexible and can accommodate larger systems, but it can also be more complex and expensive.
- Combination Series-Parallel Wiring: This layout combines the benefits of both series and parallel wiring, with multiple strings of solar panels connected in parallel. This configuration is often used in larger systems and can provide a good balance between efficiency and flexibility.
- Distributed Wiring: This layout involves distributing the solar panels across the roof or other areas of the camper, with each panel connected to a central hub or combiner box. This configuration can be more aesthetically pleasing and can help to reduce shading issues.
Best Practices for Wiring a Camper Solar Setup
To ensure a safe and efficient wiring layout for your camper solar setup, follow these best practices:
- Use the Correct Wire Size: Choose wires that are sized correctly for the amount of energy being transmitted, taking into account the voltage, current, and distance between components.
- Keep Wiring Runs Short: Minimize the length of wiring runs to reduce energy loss and voltage drop.
- Use High-Quality Connectors: Invest in high-quality connectors and cables to ensure reliable connections and minimize the risk of corrosion or damage.
- Label and Document the System: Clearly label and document the wiring layout, including the connections, components, and wiring runs. This will make it easier to troubleshoot and maintain the system.
- Consider a Combiner Box: Use a combiner box to combine multiple strings of solar panels, simplifying the wiring layout and reducing the risk of shorts or ground faults.
- Ground the System: Ensure the system is properly grounded to prevent electrical shock and protect against lightning strikes.
- Monitor the System: Install a monitoring system to track the performance of the solar setup, including the voltage, current, and energy production.

Safety Considerations for Camper Solar Setup
When designing and installing a camper solar setup, safety should be your top priority. Consider the following safety considerations:
- Electrical Shock: Ensure the system is properly grounded and insulated to prevent electrical shock.
- Fire Risk: Keep the system away from flammable materials and ensure that all components are designed and installed to minimize the risk of fire.
- Overcharging: Use a charge controller to regulate the flow of energy to the battery bank and prevent overcharging.
- Short Circuits: Use high-quality connectors and cables to minimize the risk of shorts or ground faults.
Conclusion
Designing and installing a camper solar setup can be a complex and daunting task, but with the right knowledge and planning, you can create a safe and efficient system that meets your energy needs. By understanding the components, wiring layouts, and best practices outlined in this article, you can create a reliable and sustainable source of energy for your camper or RV.
Remember to always follow safety guidelines and regulations, and consider consulting a professional if you’re unsure about any aspect of the design or installation process. With the right wiring layout and a well-designed system, you can enjoy the freedom and independence of solar power on your next camping adventure.
Additional Tips and Recommendations
- Start with a Small System: Begin with a small system and expand as needed, allowing you to test and refine the design.
- Consider a Pre-Wired System: Invest in a pre-wired system or a solar panel kit that includes pre-connected wires and connectors, simplifying the installation process.
- Use a Solar Charge Controller with MPPT: Invest in a solar charge controller with Maximum Power Point Tracking (MPPT) technology, which can optimize energy production and efficiency.
- Monitor the System Remotely: Consider installing a remote monitoring system, allowing you to track the performance of the solar setup from your smartphone or computer.
- Regular Maintenance: Regularly inspect and maintain the system, including cleaning the solar panels and checking the connections and wiring.
By following these tips and recommendations, you can create a reliable and efficient camper solar setup that provides a sustainable source of energy for your next adventure.


