“RV solar battery and inverter wiring diagram”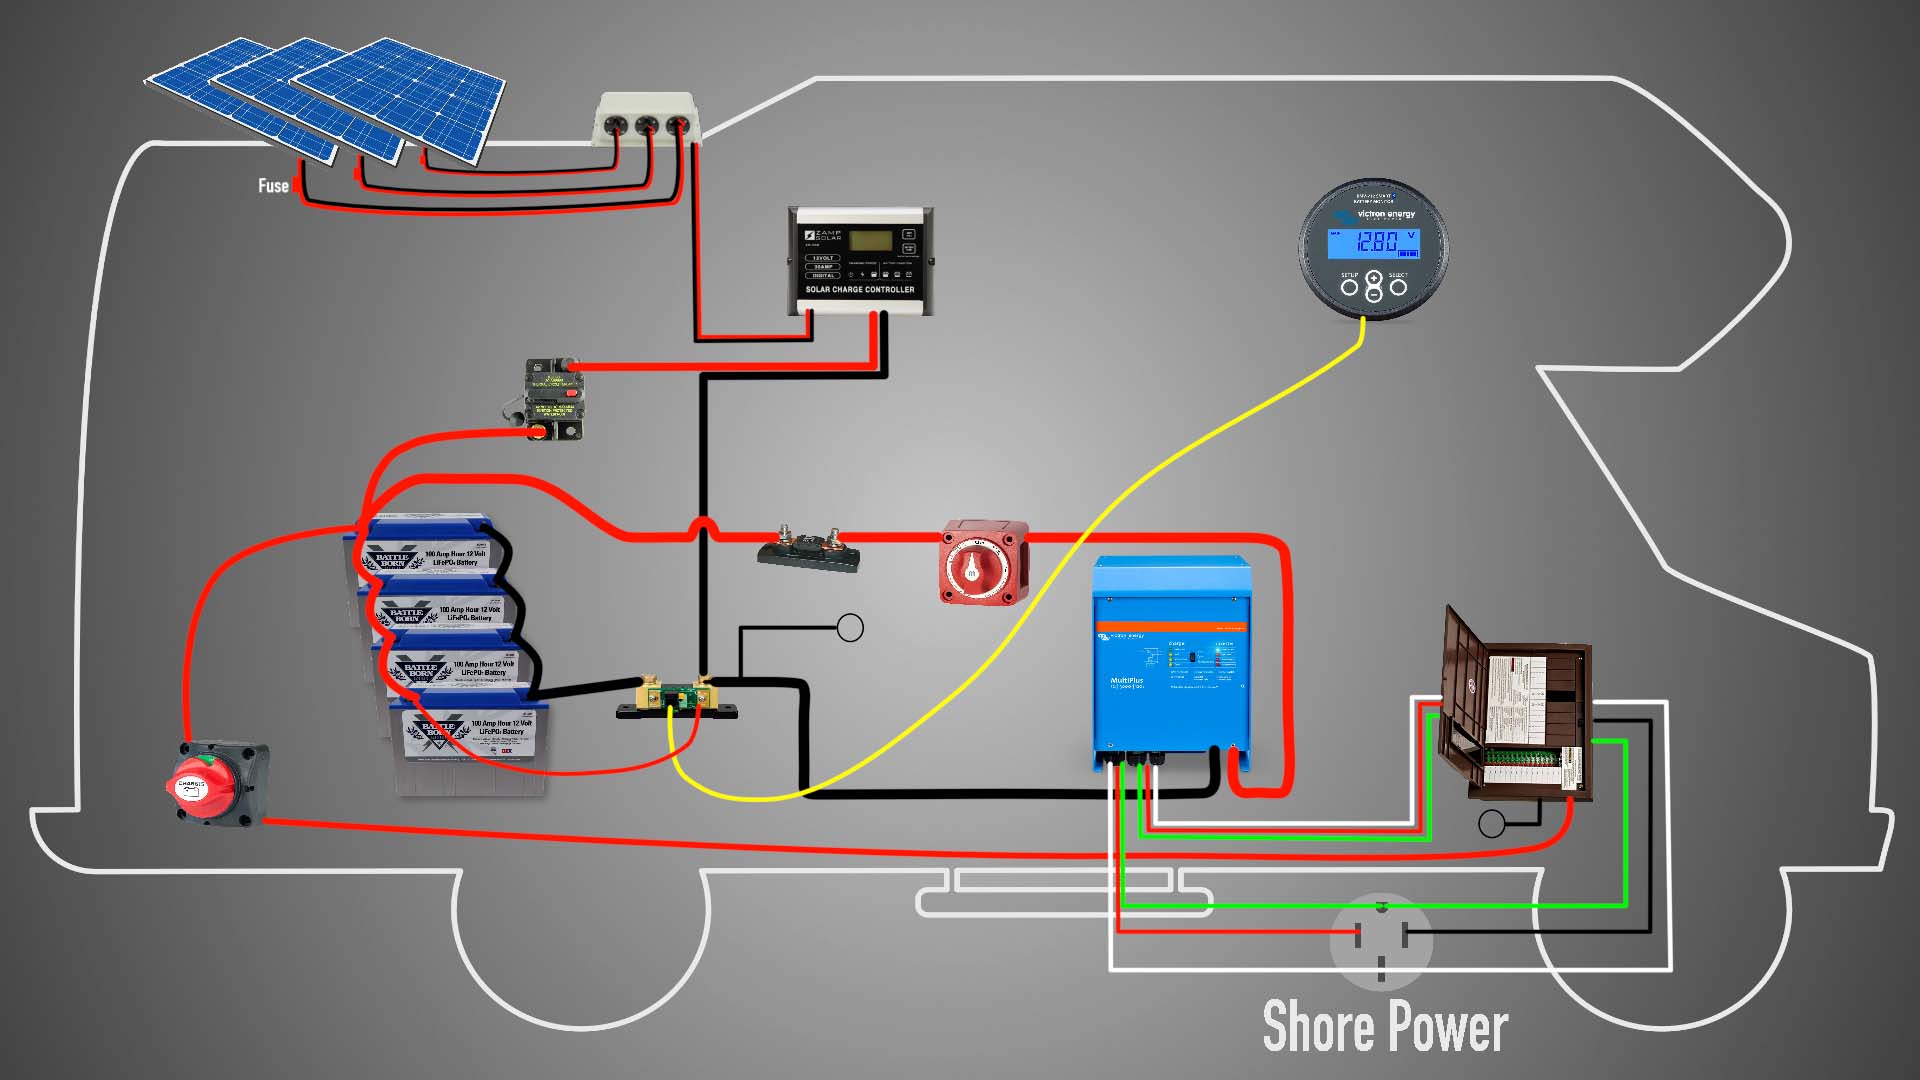
A well-designed RV solar system can provide a reliable and sustainable source of energy, but it requires careful planning and installation. One of the most critical components of an RV solar system is the wiring diagram, which connects the solar panels, batteries, and inverter. In this article, we will provide a comprehensive guide to RV solar battery and inverter wiring diagrams, including the necessary components, safety considerations, and step-by-step installation instructions.
Introduction to RV Solar Systems
An RV solar system consists of several components, including:
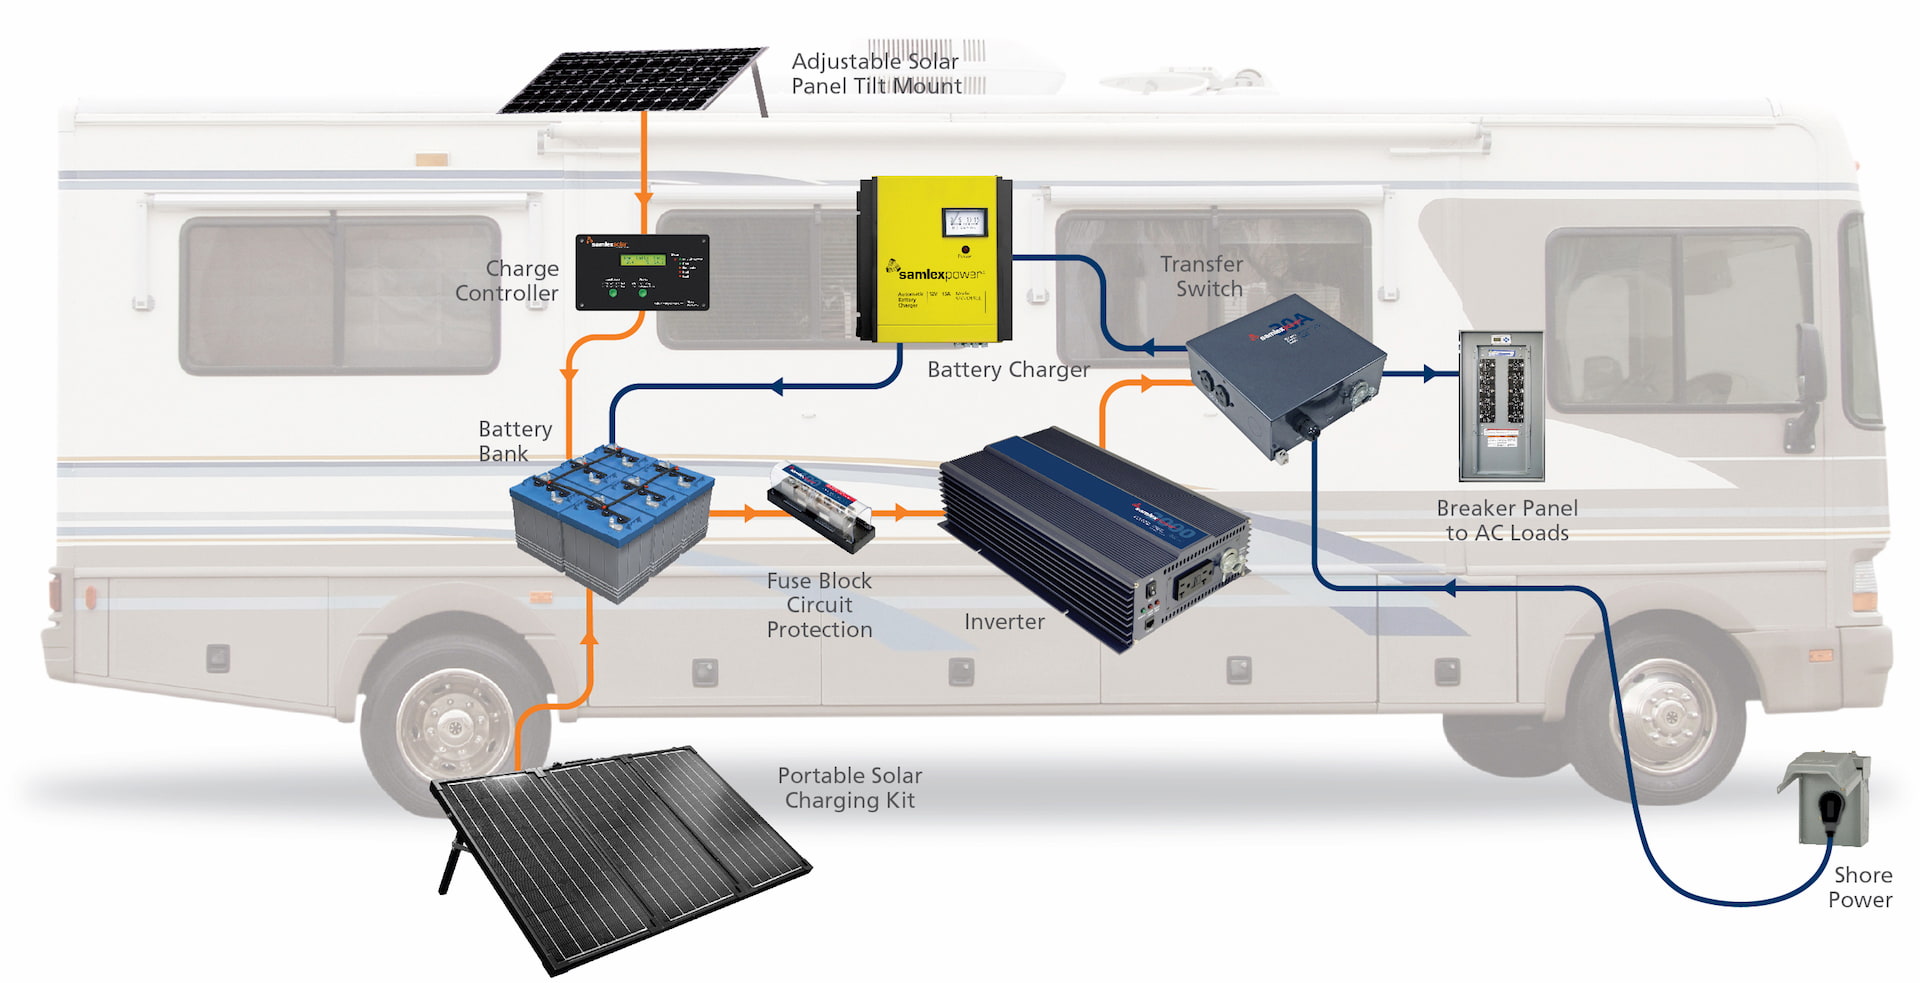
- Solar Panels: These convert sunlight into electrical energy.
- Charge Controller: This regulates the flow of energy from the solar panels to the batteries.
- Batteries: These store excess energy generated by the solar panels for later use.
- Inverter: This converts DC power from the batteries into AC power for appliances.
- Wiring Diagram: This connects all the components together, ensuring safe and efficient energy transfer.
Components of an RV Solar Battery and Inverter Wiring Diagram
A typical RV solar battery and inverter wiring diagram consists of the following components:
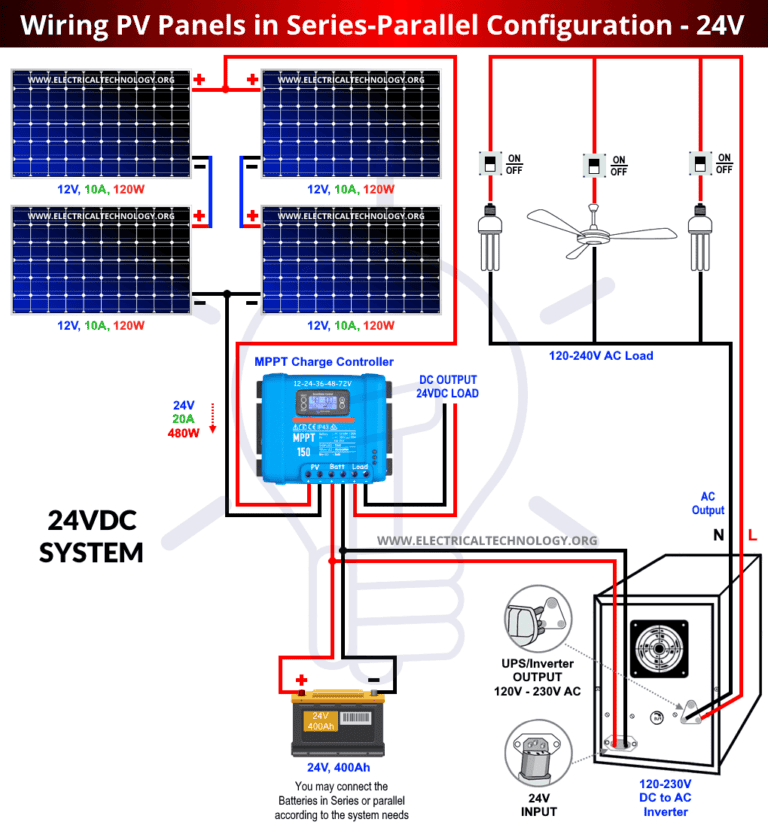
- Solar Panels: Connected in series and/or parallel to increase voltage and current.
- Charge Controller: Connected between the solar panels and batteries.
- Batteries: Connected in series and/or parallel to increase voltage and capacity.
- Inverter: Connected between the batteries and appliances.
- Grounding System: Connects all components to a common grounding point.
- Fuses and Circuit Breakers: Protect the system from overcurrent and short circuits.
- Wiring: Connects all components together, using appropriate gauge and insulation.

Safety Considerations
When designing and installing an RV solar battery and inverter wiring diagram, safety is paramount. Consider the following:
- Electrical Shock: Ensure all components are properly grounded and insulated to prevent electrical shock.
- Overcurrent Protection: Use fuses and circuit breakers to protect the system from overcurrent and short circuits.
- Fire Risk: Keep the system away from flammable materials and ensure proper ventilation.
- Weather Resistance: Use weather-resistant components and wiring to protect the system from the elements.
Step-by-Step Installation Instructions
To install an RV solar battery and inverter wiring diagram, follow these steps:
- Plan the System: Determine the size and type of solar panels, batteries, and inverter required.
- Prepare the Components: Mount the solar panels, charge controller, batteries, and inverter in a safe and accessible location.
- Connect the Solar Panels: Connect the solar panels in series and/or parallel, using appropriate wiring and connectors.
- Connect the Charge Controller: Connect the charge controller between the solar panels and batteries.
- Connect the Batteries: Connect the batteries in series and/or parallel, using appropriate wiring and connectors.
- Connect the Inverter: Connect the inverter between the batteries and appliances.
- Connect the Grounding System: Connect all components to a common grounding point.
- Install Fuses and Circuit Breakers: Install fuses and circuit breakers to protect the system from overcurrent and short circuits.
- Test the System: Test the system to ensure it is functioning correctly and safely.
Typical RV Solar Battery and Inverter Wiring Diagram
Here is a typical RV solar battery and inverter wiring diagram:
+---------------+ | Solar Panels | +---------------+ | | v +---------------+ | Charge Controller | +---------------+ | | v +---------------+ | Batteries | +---------------+ | | v +---------------+ | Inverter | +---------------+ | | v +---------------+ | Appliances | +---------------+ | | v +---------------+ | Grounding System | +---------------+Wiring Diagram Example
Here is an example of a wiring diagram for a small RV solar system:
Solar Panels (2x 100W) ---> Charge Controller ---> Batteries (2x 100Ah) | | v Inverter (1000W) ---> Appliances (lights, TV, fridge) | | v Grounding System ---> Common Grounding PointConclusion
An RV solar battery and inverter wiring diagram is a critical component of a safe and efficient RV solar system. By following the guidelines outlined in this article, you can design and install a reliable and sustainable energy system for your RV. Remember to consider safety, electrical shock, overcurrent protection, fire risk, and weather resistance when designing and installing your system. With proper planning and installation, an RV solar system can provide a reliable source of energy for your RV, reducing your reliance on generators and grid power.
Additional Tips and Considerations
- Always follow the manufacturer’s instructions for the specific components used in your system.
- Use appropriate gauge and insulation for the wiring to prevent electrical shock and overheating.
- Keep the system well-ventilated to prevent overheating and reduce fire risk.
- Consider using a monitoring system to track the performance of your solar system.
- Regularly inspect and maintain the system to ensure it is functioning correctly and safely.
By following these guidelines and considerations, you can create a safe and efficient RV solar battery and inverter wiring diagram, providing a reliable source of energy for your RV adventures.