“Step-by-step home solar wiring guide”
Installing a home solar system can seem like a daunting task, but with the right guidance, you can navigate the process with ease. In this article, we will walk you through a step-by-step home solar wiring guide to help you understand the process and ensure a safe and successful installation.
Pre-Installation Checklist
Before you begin the wiring process, it’s essential to ensure that you have completed the necessary pre-installation steps. These include:
- Assessing your energy needs: Calculate your energy usage to determine the size of the solar system you need.
- Choosing the right equipment: Select a solar panel system that meets your energy needs and is compatible with your roof type and local building codes.
- Obtaining necessary permits: Secure the required permits from your local government before commencing the installation.
- Hiring a licensed electrician: If you’re not experienced in electrical work, consider hiring a licensed electrician to ensure a safe and compliant installation.
Step 1: Plan the Wiring Route
The first step in the wiring process is to plan the route that your wiring will take. This involves identifying the most efficient and safest path for your wires to travel from the solar panels to the inverter, and then to the electrical panel. Consider the following factors:
- Minimize wire length: Keep wire lengths as short as possible to reduce energy loss and minimize the risk of electrical shock.
- Avoid obstacles: Plan the wiring route to avoid obstacles such as roof vents, chimneys, and skylights.
- Comply with building codes: Ensure that your wiring route complies with local building codes and regulations.

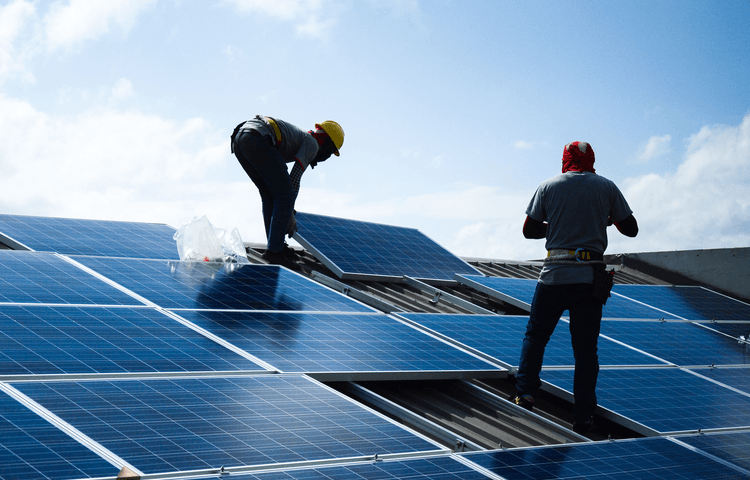
Step 2: Install the Solar Panels
Once you have planned the wiring route, you can begin installing the solar panels. This involves:
- Mounting the panels: Mount the solar panels to the roof using a durable and weather-resistant mounting system.
- Connecting the panels: Connect the solar panels in series and/or parallel to achieve the desired voltage and current output.
- Securing the wiring: Secure the wiring to the roof using clips or cable ties to prevent damage from wind or weather.
Step 3: Install the Inverter
The inverter is a critical component of your solar system, as it converts the DC power generated by the solar panels into AC power that can be used in your home. To install the inverter:
- Choose a location: Select a location for the inverter that is dry, cool, and well-ventilated.
- Mount the inverter: Mount the inverter to a wall or floor using a sturdy mounting system.
- Connect the inverter: Connect the solar panels to the inverter, following the manufacturer’s instructions.
Step 4: Install the Grounding System
A grounding system is essential for ensuring the safety of your solar system. To install the grounding system:
- Drive a grounding rod: Drive a grounding rod into the earth, ensuring that it is at least 8 feet deep.
- Connect the grounding wire: Connect the grounding wire to the grounding rod and the solar panels.
- Verify the grounding: Verify that the grounding system is functioning correctly using a multimeter.
Step 5: Connect the Inverter to the Electrical Panel
Once the inverter is installed, you can connect it to the electrical panel. This involves:
- Identify the electrical panel: Identify the main electrical panel in your home, which is usually located in the basement or utility room.
- Connect the inverter: Connect the inverter to the electrical panel, following the manufacturer’s instructions.
- Verify the connection: Verify that the connection is secure and meets local building codes.
Step 6: Install Circuit Breakers and Fuses
Circuit breakers and fuses are essential for protecting your solar system from electrical overloads. To install circuit breakers and fuses:
- Choose the right components: Select circuit breakers and fuses that are compatible with your solar system and meet local building codes.
- Install the circuit breakers: Install the circuit breakers in the electrical panel, following the manufacturer’s instructions.
- Install the fuses: Install the fuses in the inverter and solar panels, following the manufacturer’s instructions.
Step 7: Test the System
Once the wiring is complete, you can test the system to ensure that it is functioning correctly. This involves:
- Verify the voltage: Verify that the voltage output from the solar panels is within the expected range.
- Verify the current: Verify that the current output from the solar panels is within the expected range.
- Test the inverter: Test the inverter to ensure that it is converting the DC power to AC power correctly.
Step 8: Inspect and Maintain the System
Regular inspections and maintenance are essential for ensuring the longevity and efficiency of your solar system. This involves:
- Regular cleaning: Regularly clean the solar panels to ensure that they are free from debris and dirt.
- Inspect the wiring: Regularly inspect the wiring to ensure that it is secure and undamaged.
- Check the inverter: Regularly check the inverter to ensure that it is functioning correctly and efficiently.
Conclusion
Installing a home solar system can seem like a daunting task, but with the right guidance, you can navigate the process with ease. By following this step-by-step home solar wiring guide, you can ensure a safe and successful installation. Remember to always follow local building codes and regulations, and consider hiring a licensed electrician if you’re not experienced in electrical work. With proper installation and maintenance, your solar system can provide you with clean, renewable energy for years to come.
Additional Tips and Considerations
- Always follow the manufacturer’s instructions for specific components and equipment.
- Ensure that all wiring and connections are secure and meet local building codes.
- Consider installing a monitoring system to track the performance of your solar system.
- Regularly inspect and maintain your solar system to ensure optimal performance and longevity.
- Consider hiring a professional to perform routine maintenance and inspections.
By following this comprehensive guide, you can ensure a safe and successful installation of your home solar system. Remember to always prioritize safety and compliance, and don’t hesitate to seek professional help if you’re unsure about any aspect of the installation process. With the right knowledge and guidance, you can enjoy the benefits of clean, renewable energy from your home solar system.