“How to wire a grid-tied solar panel system with inverter?”
A grid-tied solar panel system with an inverter is a common configuration that allows you to generate electricity from the sun and feed it back into the grid, reducing your reliance on traditional energy sources. In this article, we will provide a step-by-step guide on how to wire a grid-tied solar panel system with an inverter, covering the necessary components, wiring requirements, and safety considerations.
Introduction to Grid-Tied Solar Panel Systems
A grid-tied solar panel system is a type of solar power system that connects to the utility grid and allows you to generate electricity from the sun while still being connected to the grid. This configuration provides several benefits, including:
- Net metering: excess energy generated by your solar panel system can be sold back to the utility company, reducing your energy bills.
- Grid stability: grid-tied systems help stabilize the grid by providing a decentralized source of energy.
- No battery required: since the system is connected to the grid, you don’t need a battery bank to store excess energy.
Components of a Grid-Tied Solar Panel System
Before we dive into the wiring process, let’s identify the key components of a grid-tied solar panel system:
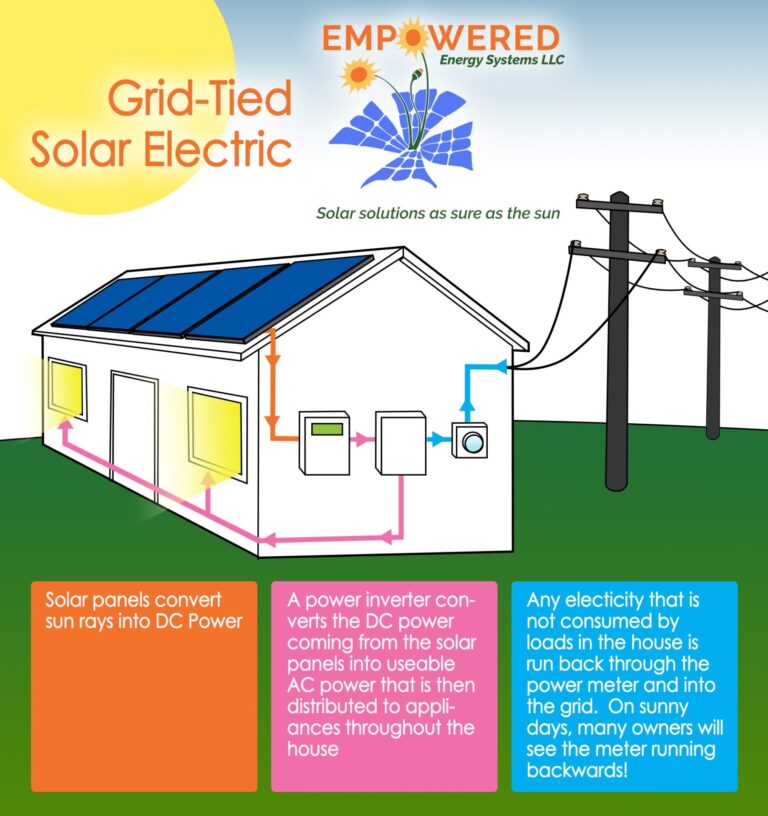
- Solar panels: these are the photovoltaic (PV) panels that convert sunlight into electrical energy.
- Inverter: this device converts the DC power generated by the solar panels into AC power that can be used by your home or business.
- Mounting system: this includes the racking and mounting hardware that secures the solar panels to your roof or ground.
- Disconnects: these are safety devices that allow you to disconnect the solar panel system from the grid in case of an emergency.
- Grounding system: this includes the equipment grounding conductor (EGC) and the grounding electrode that ensure the system is properly grounded.
- Utility meter: this measures the energy generated by your solar panel system and the energy consumed by your home or business.

Wiring Requirements
To wire a grid-tied solar panel system with an inverter, you’ll need to follow these general guidelines:
- Conductor sizing: the conductor size will depend on the system’s voltage, current, and power requirements. Typically, a 10 AWG or 12 AWG conductor is used for the solar panel array.
- Insulation and shielding: use insulated and shielded conductors to prevent electromagnetic interference (EMI) and ensure safe operation.
- Color coding: follow the standard color coding conventions for solar panel systems:
- Positive (+) conductors: red or orange
- Negative (-) conductors: black or blue
- Grounding conductors: green or green with yellow stripes
- Voltage and current limitations: ensure that the wiring and components can handle the system’s maximum voltage and current ratings.
Step-by-Step Wiring Guide
Here’s a step-by-step guide to wiring a grid-tied solar panel system with an inverter:
Step 1: Connect the Solar Panels
- Connect the solar panels in series to achieve the desired voltage (typically 600-1000 VDC).
- Use a string combiner to connect multiple strings of solar panels together.
- Ensure that the positive and negative conductors are properly connected and secured.
Step 2: Connect the Inverter
- Connect the inverter to the solar panel array using the recommended conductor size and type.
- Follow the inverter manufacturer’s instructions for connecting the DC input terminals.
- Connect the inverter’s AC output terminals to the grid connection point.
Step 3: Connect the Grounding System
- Connect the equipment grounding conductor (EGC) to the solar panel array and inverter.
- Connect the grounding electrode to the grounding system.
- Ensure that the grounding system is properly bonded to the electrical panel and other equipment.
Step 4: Connect the Disconnects
- Connect the disconnects between the solar panel array and inverter.
- Connect the disconnects between the inverter and grid connection point.
- Ensure that the disconnects are properly labeled and secured.
Step 5: Connect the Utility Meter
- Connect the utility meter to the grid connection point.
- Follow the utility company’s instructions for installing and configuring the meter.
Safety Considerations
When wiring a grid-tied solar panel system with an inverter, safety is paramount. Consider the following:
- Electrocution hazard: never touch live electrical components or conductors.
- Fire hazard: ensure that the system is properly designed and installed to prevent electrical fires.
- Arc flash hazard: follow the recommended safety protocols for working with electrical systems.
- Weather conditions: ensure that the system is designed and installed to withstand local weather conditions, including wind, rain, and extreme temperatures.
Best Practices
To ensure a safe and efficient installation, follow these best practices:
- Hire a licensed electrician: unless you have extensive experience with electrical systems, hire a licensed electrician to perform the installation.
- Follow local codes and regulations: comply with local electrical codes, regulations, and standards.
- Use high-quality components: select components that meet or exceed industry standards and are compatible with your system’s requirements.
- Test and commission the system: thoroughly test and commission the system to ensure that it’s operating safely and efficiently.
Conclusion
Wiring a grid-tied solar panel system with an inverter requires careful planning, attention to detail, and a thorough understanding of electrical systems. By following the steps outlined in this guide and adhering to safety considerations and best practices, you can ensure a safe and efficient installation that will provide you with clean, renewable energy for years to come. Remember to always consult local codes and regulations, and seek the advice of a licensed electrician if you’re unsure about any aspect of the installation. With the right knowledge and expertise, you can harness the power of the sun and reduce your reliance on traditional energy sources.


