“How to connect solar panels to a home breaker box”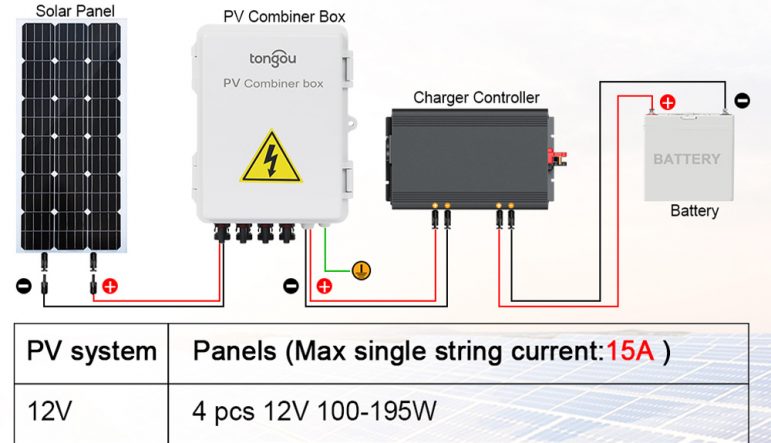
One of the most important steps in installing a solar panel system is connecting it to your home’s breaker box. In this article, we’ll walk you through the process of connecting solar panels to a home breaker box, including the necessary materials, safety precautions, and step-by-step instructions.
Understanding the Basics
Before we dive into the installation process, it’s essential to understand the basics of solar panel systems and how they integrate with your home’s electrical system. A solar panel system consists of several components, including:
- Solar Panels: These are the photovoltaic (PV) panels that convert sunlight into electrical energy.
- Inverter: This device converts the DC power generated by the solar panels into AC power, which is usable in your home.
- Mounting System: This includes the racking and mounting hardware that secures the solar panels to your roof or ground mount.
- Electrical Panel: This is the main electrical panel, also known as the breaker box, where the solar panel system is connected to your home’s electrical system.
Materials Needed
To connect your solar panel system to your home’s breaker box, you’ll need the following materials:
- Solar Panel Array: This includes the solar panels, mounting system, and wiring.
- Inverter: Choose an inverter that is compatible with your solar panel system and meets your energy needs.
- AC Disconnect: This is a switch that allows you to disconnect the solar panel system from the grid for maintenance or repairs.
- Grounding Equipment: This includes grounding rods, clamps, and wire to ensure the system is properly grounded.
- Wiring and Connectors: Use compatible wiring and connectors to connect the solar panel system to the inverter and breaker box.
- Breaker Box: Ensure your breaker box has enough space and capacity to accommodate the solar panel system.

Safety Precautions
Before starting the installation, it’s crucial to take the following safety precautions:
- Turn Off the Main Power: Switch off the main power to your home at the breaker box or meter base.
- Use Personal Protective Equipment: Wear protective gear, including gloves, safety glasses, and a hard hat, when working with electrical systems.
- Ensure Proper Ventilation: Work in a well-ventilated area, away from any flammable materials.
- Follow Local Electrical Codes: Familiarize yourself with local electrical codes and regulations, and ensure your installation meets these standards.
Step-by-Step Instructions
Now that we’ve covered the basics and safety precautions, let’s move on to the step-by-step instructions for connecting your solar panel system to your home’s breaker box:
Step 1: Mount the Solar Panels
- Install the Mounting System: Secure the mounting system to your roof or ground mount, ensuring it is level and plumb.
- Install the Solar Panels: Mount the solar panels to the mounting system, following the manufacturer’s instructions.
- Connect the Solar Panels: Connect the solar panels in series or parallel, depending on your system design, using compatible wiring and connectors.
Step 2: Install the Inverter
- Choose a Location: Select a location for the inverter, usually near the breaker box, that is well-ventilated and accessible.
- Mount the Inverter: Secure the inverter to a wall or mounting bracket, following the manufacturer’s instructions.
- Connect the Inverter: Connect the solar panel array to the inverter, using compatible wiring and connectors.
Step 3: Install the AC Disconnect
- Choose a Location: Select a location for the AC disconnect, usually near the inverter, that is accessible and visible.
- Mount the AC Disconnect: Secure the AC disconnect to a wall or mounting bracket, following the manufacturer’s instructions.
- Connect the AC Disconnect: Connect the inverter to the AC disconnect, using compatible wiring and connectors.
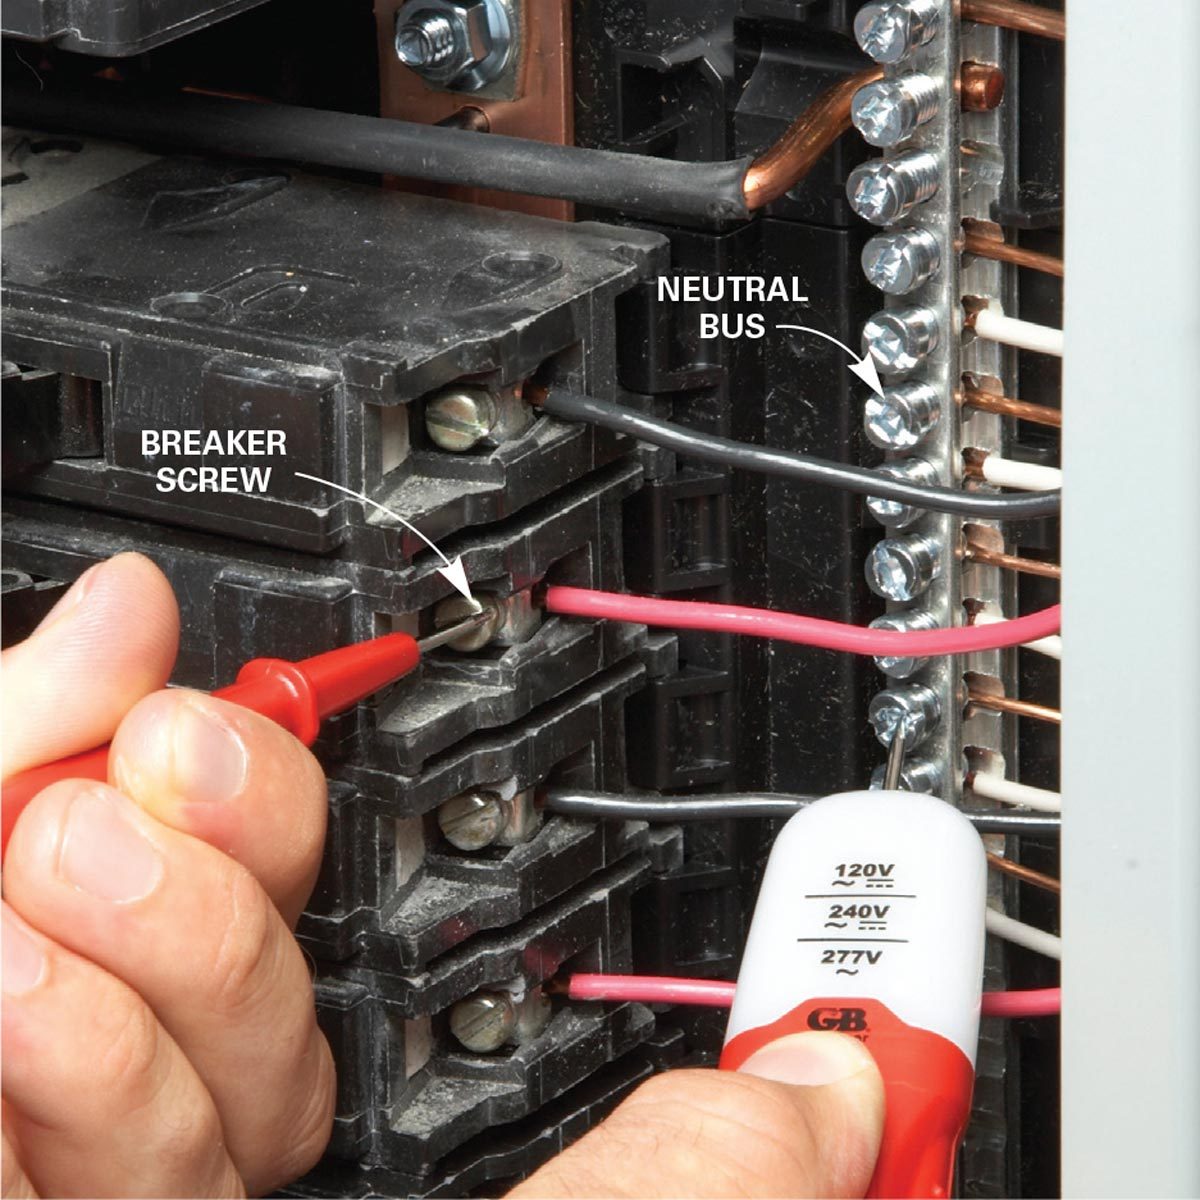
Step 4: Connect to the Breaker Box
- Identify the Main Breaker: Identify the main breaker in your breaker box, which is usually the largest breaker.
- Install a New Breaker: Install a new breaker, specifically designed for solar panel systems, in the breaker box.
- Connect the Solar Panel System: Connect the solar panel system to the new breaker, using compatible wiring and connectors.
- Ground the System: Connect the grounding equipment to the solar panel system, ensuring it is properly grounded.
Step 5: Final Inspection and Testing
- Inspect the System: Inspect the entire solar panel system, ensuring all connections are secure and meet local electrical codes.
- Test the System: Test the solar panel system, ensuring it is producing power and functioning correctly.
- Obtain Permission to Operate: Obtain permission to operate the solar panel system from your local utility company, if required.
Conclusion
Connecting solar panels to a home breaker box requires careful planning, attention to detail, and adherence to safety precautions. By following the steps outlined in this article, you can ensure a safe and successful installation. Remember to always follow local electrical codes and regulations, and consult a professional if you’re unsure about any aspect of the installation. With a properly installed solar panel system, you can enjoy the benefits of renewable energy, reduce your reliance on traditional energy sources, and lower your utility bills.