“Complete off-grid campervan solar wiring”
However, when it comes to powering your campervan, relying on traditional generators or hookups can be limiting and harm the environment. This is where solar power comes in – a clean, renewable, and virtually limitless source of energy. In this article, we’ll take you through the process of setting up a complete off-grid campervan solar wiring system, allowing you to harness the power of the sun and enjoy your camping experience like never before.
Understanding the Basics
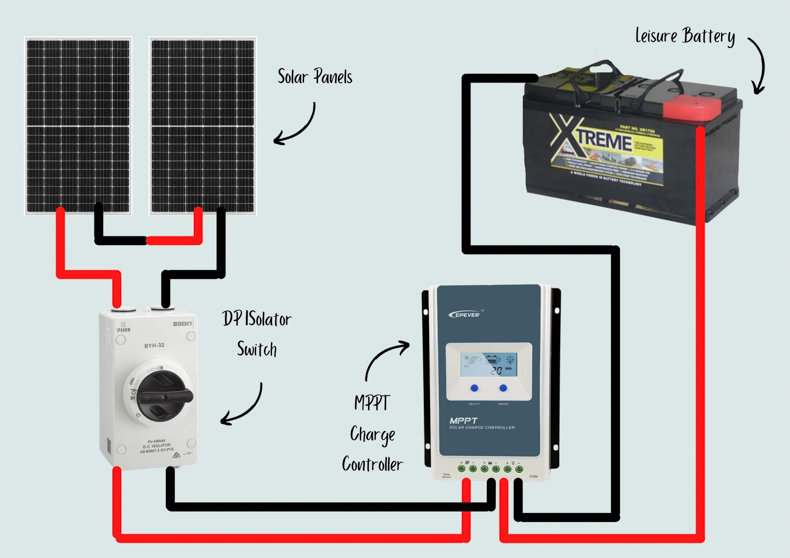
Before diving into the nitty-gritty of solar wiring, it’s essential to grasp the fundamental concepts of solar power and how it applies to campervans. A typical solar panel array consists of photovoltaic (PV) cells that convert sunlight into electrical energy. This energy is then stored in a battery bank, which powers your campervan’s electrical systems, such as lights, refrigerators, and appliances. To set up a reliable off-grid solar wiring system, you’ll need to consider the following components:
- Solar Panels: These are the primary source of energy for your campervan. Choose panels with a suitable wattage and voltage rating to meet your energy needs.
- Charge Controller: This device regulates the flow of energy from the solar panels to the battery bank, preventing overcharging and ensuring efficient energy storage.
- Battery Bank: A deep cycle battery bank is designed to store excess energy generated by the solar panels for later use.
- Inverter/Charger: This component converts DC power from the battery bank to AC power, allowing you to run appliances and charge devices.
- Wiring and Connectors: Proper wiring and connectors are crucial for safe and efficient energy transfer between components.
Solar Panel Selection and Installation
Choosing the right solar panels for your campervan is critical. Consider the following factors:
- Wattage: Calculate your energy needs based on your campervan’s appliances and devices. A general rule of thumb is to aim for a minimum of 200-300 watts of solar power for a small campervan.
- Voltage: Ensure the voltage rating of your solar panels matches your charge controller and battery bank.
- Size and Weight: Select panels that fit your campervan’s roof or available space, considering weight and wind resistance.
- Efficiency: Look for panels with high efficiency ratings to maximize energy production.
Once you’ve selected your solar panels, follow these installation steps:
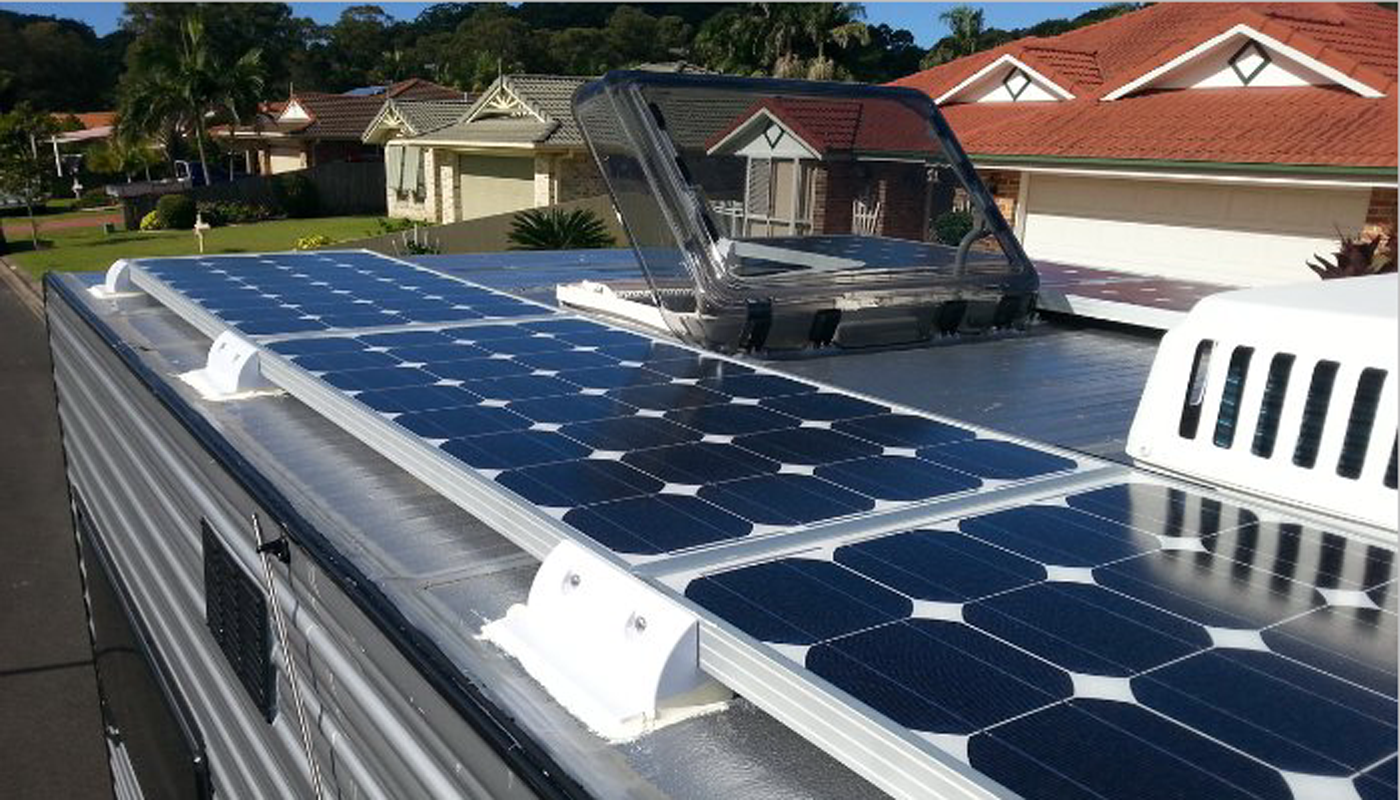
- Mounting: Securely attach the solar panels to your campervan’s roof using a suitable mounting system, ensuring minimal shading and optimal sun exposure.
- Wiring: Connect the solar panels to the charge controller using MC4 connectors or equivalent, following the manufacturer’s instructions.
- Grounding: Ensure proper grounding of the solar panel array to prevent electrical shock and ensure safe operation.

Charge Controller Setup
The charge controller is a critical component in your solar wiring system, responsible for regulating energy flow and preventing overcharging. When selecting a charge controller, consider the following:
- Type: Choose between PWM (Pulse Width Modulation) and MPPT (Maximum Power Point Tracking) charge controllers, with MPPT being the more efficient option.
- Rating: Ensure the charge controller’s rating matches your solar panel array’s wattage and voltage.
- Features: Look for features like battery temperature sensing, remote monitoring, and adjustable charging parameters.
To set up your charge controller:
- Connection: Connect the solar panels to the charge controller, following the manufacturer’s instructions.
- Battery Connection: Connect the charge controller to the battery bank, ensuring correct polarity and wiring.
- Configuration: Configure the charge controller according to the manufacturer’s guidelines, setting parameters like charging voltage, current, and temperature compensation.
Battery Bank Configuration
A suitable battery bank is essential for storing excess energy generated by your solar panels. When selecting a battery bank, consider the following:
- Type: Choose between lead-acid, AGM, or lithium-ion batteries, each with their pros and cons.
- Capacity: Calculate your energy needs and select a battery bank with sufficient capacity to meet those needs.
- Voltage: Ensure the battery bank’s voltage rating matches your charge controller and inverter/charger.
To set up your battery bank:
- Connection: Connect the batteries in series and/or parallel to achieve the desired voltage and capacity.
- Wiring: Connect the battery bank to the charge controller and inverter/charger, following the manufacturer’s instructions.
- Monitoring: Install a battery monitor to track the battery bank’s state of charge, voltage, and temperature.
Inverter/Charger Setup
The inverter/charger converts DC power from the battery bank to AC power, allowing you to run appliances and charge devices. When selecting an inverter/charger, consider the following:
- Rating: Ensure the inverter/charger’s rating matches your energy needs and battery bank capacity.
- Type: Choose between pure sine wave, modified sine wave, or square wave inverters, with pure sine wave being the most suitable for sensitive electronics.
- Features: Look for features like automatic transfer switching, remote monitoring, and adjustable charging parameters.
To set up your inverter/charger:
- Connection: Connect the inverter/charger to the battery bank, following the manufacturer’s instructions.
- AC Output: Connect the inverter/charger to your campervan’s AC distribution panel, ensuring correct wiring and polarity.
- Configuration: Configure the inverter/charger according to the manufacturer’s guidelines, setting parameters like output voltage, frequency, and charging current.
Wiring and Safety Considerations
Proper wiring and safety considerations are crucial for a reliable and safe off-grid solar wiring system. Follow these guidelines:
- Wiring Size: Use suitable wiring sizes to minimize energy loss and prevent overheating.
- Insulation: Ensure all wiring is properly insulated to prevent electrical shock and short circuits.
- Fuses and Breakers: Install fuses and breakers to protect your system from overcurrent and fault conditions.
- Grounding: Ensure proper grounding of all components, including the solar panel array, battery bank, and inverter/charger.
- Monitoring: Install monitoring systems to track your system’s performance, energy production, and battery state of charge.
Conclusion
Setting up a complete off-grid campervan solar wiring system requires careful planning, attention to detail, and a thorough understanding of the components involved. By following the guidelines outlined in this article, you can create a reliable and efficient solar power system, allowing you to enjoy your camping experience without the need for generators or hookups. Remember to always follow safety protocols and manufacturer instructions when working with electrical systems, and don’t hesitate to seek professional help if you’re unsure about any aspect of the installation process. Happy camping!