“Campervan solar panel wiring setup”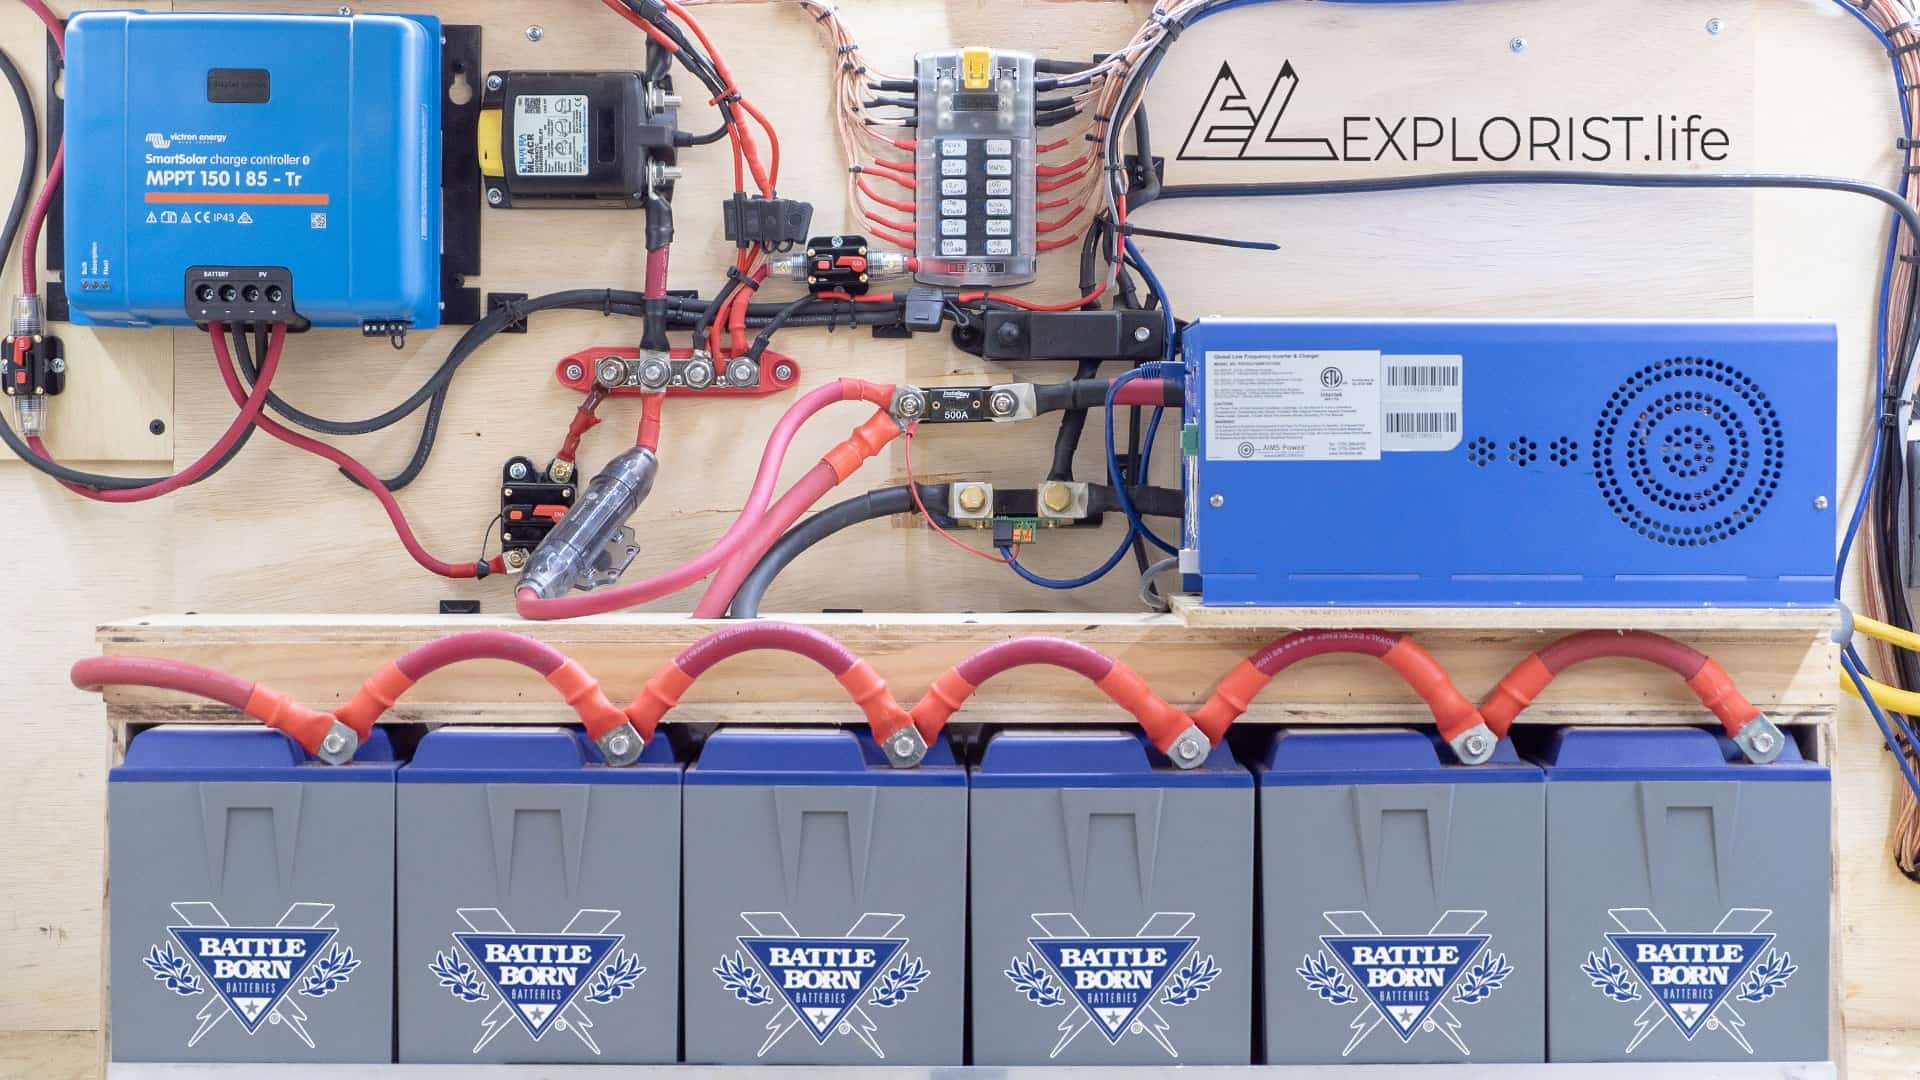
Harnessing the power of the sun to charge your batteries and power your appliances is not only eco-friendly but also cost-effective. However, setting up a campervan solar panel wiring system can be a daunting task, especially for those new to electrical systems. In this article, we will provide a comprehensive guide on how to set up a campervan solar panel wiring system, covering the basics, components, and step-by-step instructions.
Introduction to Campervan Solar Panel Systems
Before we dive into the wiring setup, it’s essential to understand the basics of a campervan solar panel system. A typical system consists of:
- Solar Panels: These are the photovoltaic (PV) panels that convert sunlight into electrical energy.
- Charge Controller: This component regulates the flow of energy from the solar panels to the battery, preventing overcharging and protecting the battery from damage.
- Battery: This is the deep cycle battery that stores the energy generated by the solar panels.
- Inverter/Charger: This component converts the DC power from the battery to AC power for appliances and also charges the battery from an external power source (e.g., shore power).
- Wiring and Electrical Components: These include the wires, fuses, circuit breakers, and connectors that connect the various components.
Components and Materials Needed
To set up a campervan solar panel wiring system, you’ll need the following components and materials:
- Solar Panels: Choose the right size and type of solar panels for your campervan, considering factors like power output, efficiency, and durability.
- Charge Controller: Select a charge controller that matches your solar panel’s voltage and current output.
- Battery: Choose a deep cycle battery that meets your energy storage needs.
- Inverter/Charger: Select an inverter/charger that matches your battery’s voltage and current output.
- Wiring and Electrical Components: Use high-quality, insulated wires (e.g., 10 AWG or 6 mm²) and electrical components (e.g., fuses, circuit breakers, connectors) rated for the system’s voltage and current.
- Mounting Hardware: Use suitable mounting hardware (e.g., brackets, clamps) to secure the solar panels, charge controller, and other components.
- Tools: Gather the necessary tools, such as wire strippers, crimpers, and a multimeter.

Step-by-Step Wiring Setup Guide
Follow these steps to set up your campervan solar panel wiring system:
Step 1: Plan the System
- Determine the total power output of your solar panels and the energy storage capacity of your battery.
- Calculate the total power consumption of your appliances and devices.
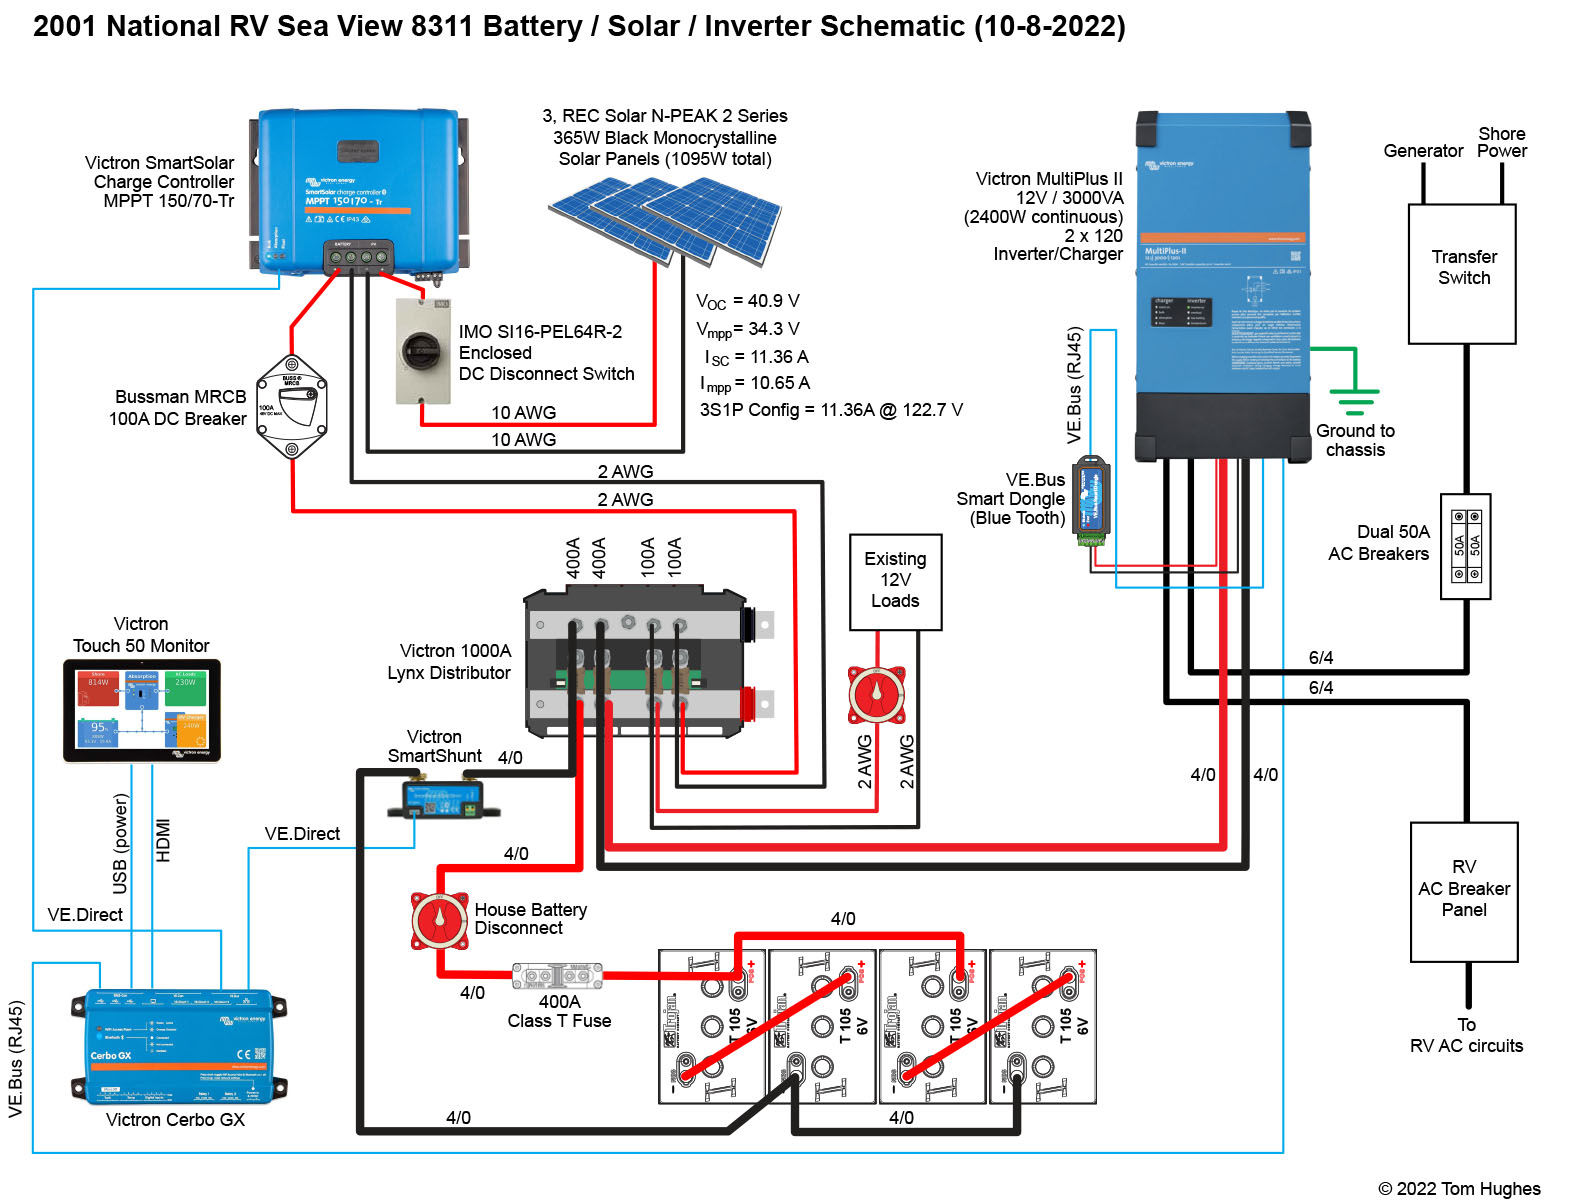
- Create a wiring diagram to visualize the system’s components and connections.
Step 2: Mount the Solar Panels
- Choose a suitable location for the solar panels, considering factors like shading, wind resistance, and accessibility.
- Secure the solar panels to the campervan’s roof or a suitable mounting frame using brackets or clamps.
- Connect the solar panels in series or parallel to achieve the desired voltage and current output.
Step 3: Install the Charge Controller
- Mount the charge controller in a dry, ventilated area, away from direct sunlight and moisture.
- Connect the solar panels to the charge controller, following the manufacturer’s instructions.
- Configure the charge controller settings to match your battery’s voltage and charging requirements.
Step 4: Connect the Battery
- Mount the battery in a secure, well-ventilated area, away from direct sunlight and moisture.
- Connect the charge controller to the battery, following the manufacturer’s instructions.
- Ensure the battery is fully charged before connecting it to the system.
Step 5: Install the Inverter/Charger
- Mount the inverter/charger in a dry, ventilated area, away from direct sunlight and moisture.
- Connect the battery to the inverter/charger, following the manufacturer’s instructions.
- Configure the inverter/charger settings to match your appliances’ voltage and power requirements.
Step 6: Connect the Appliances
- Connect your appliances and devices to the inverter/charger, following the manufacturer’s instructions.
- Ensure all appliances are compatible with the system’s voltage and power output.
Step 7: Test the System
- Test the system to ensure all components are functioning correctly.
- Monitor the system’s performance, checking for any signs of malfunction or inefficiency.
Best Practices and Safety Considerations
To ensure a safe and efficient campervan solar panel wiring system, follow these best practices and safety considerations:
- Use high-quality components: Choose components that meet or exceed the system’s voltage and current requirements.
- Follow manufacturer instructions: Adhere to the manufacturer’s instructions for each component, including wiring and installation guidelines.
- Use proper wiring and connectors: Use high-quality, insulated wires and connectors to prevent electrical shock and system malfunction.
- Ensure proper ventilation: Provide adequate ventilation for the system’s components to prevent overheating and moisture accumulation.
- Monitor system performance: Regularly inspect and maintain the system to ensure optimal performance and safety.
Conclusion
Setting up a campervan solar panel wiring system requires careful planning, attention to detail, and adherence to safety guidelines. By following this comprehensive guide, you’ll be able to create a reliable, efficient, and eco-friendly solar panel system that powers your campervan appliances and devices. Remember to choose high-quality components, follow manufacturer instructions, and ensure proper ventilation and maintenance to ensure a safe and enjoyable camping experience. Happy camping!


