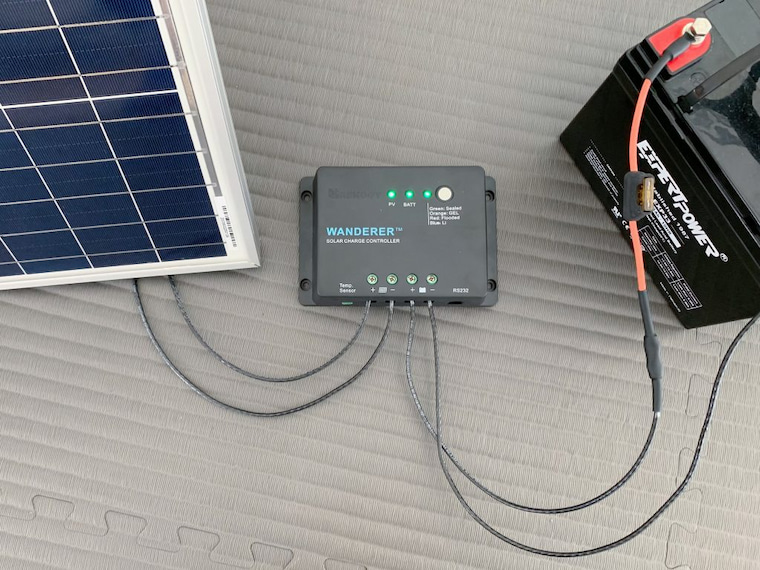
“Camper solar wiring layout with charge controller and battery”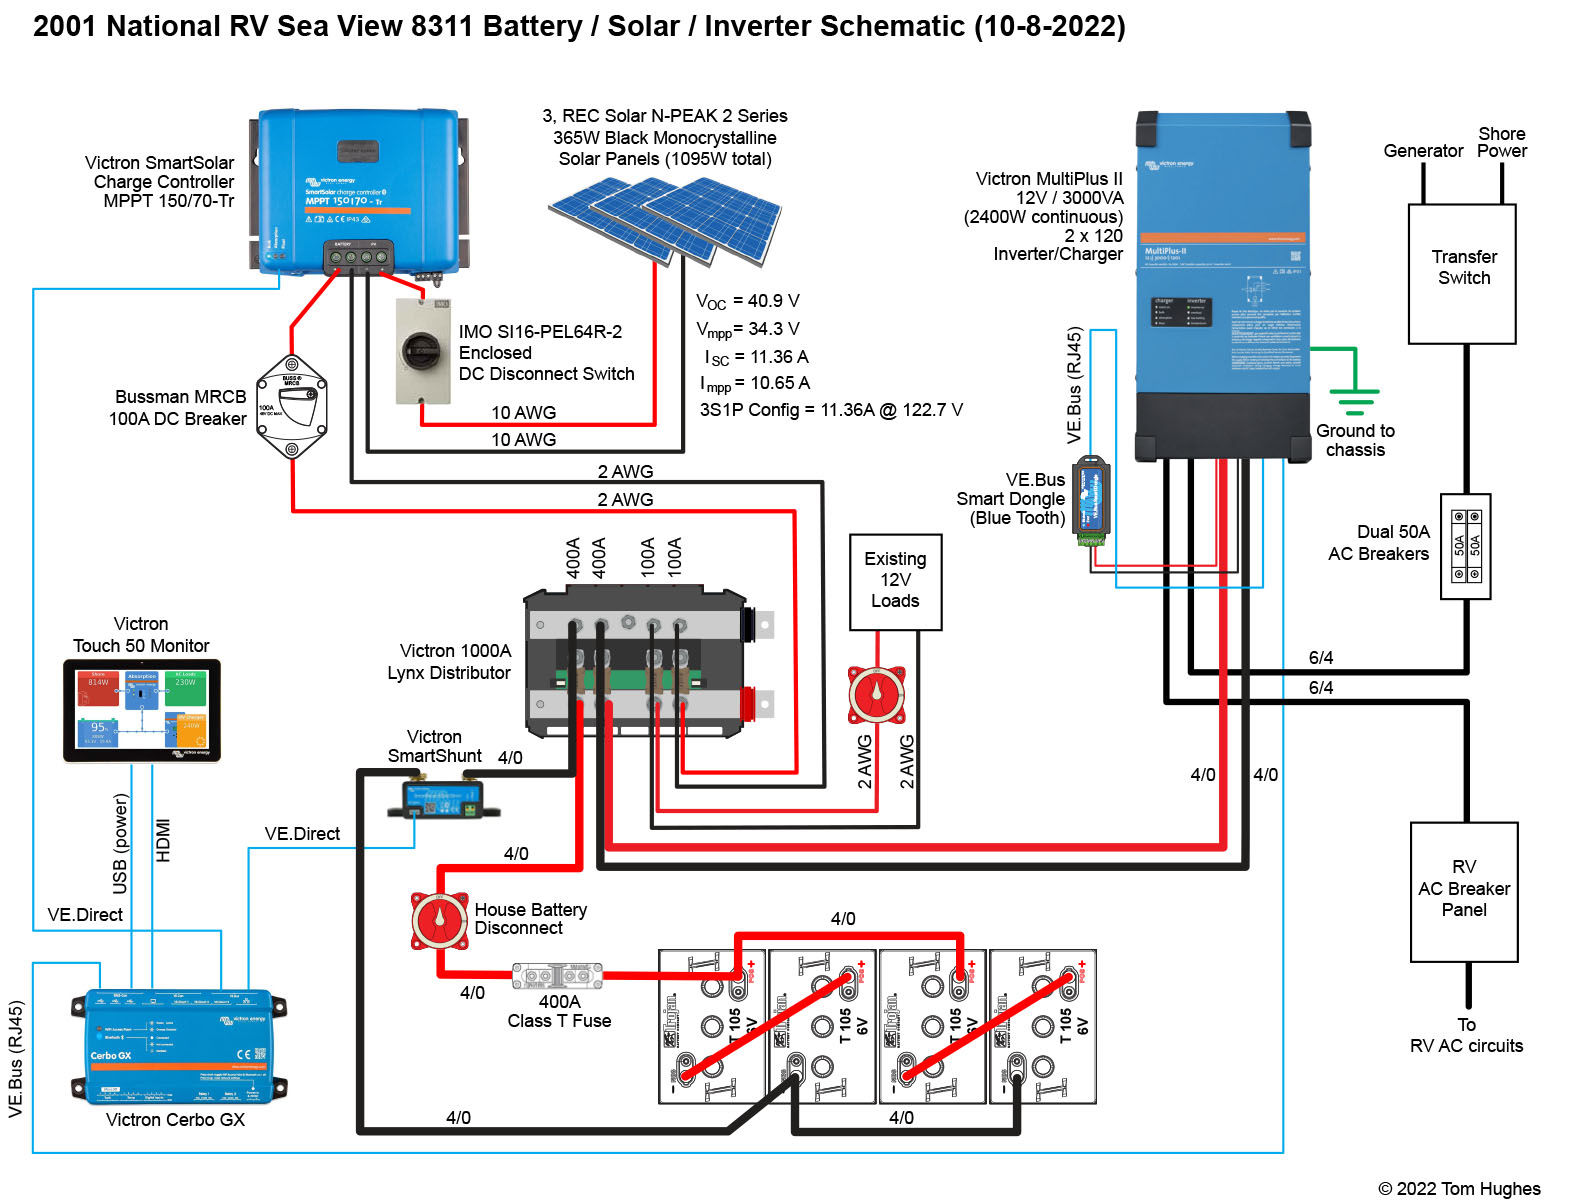
Installing a solar panel system in your camper can provide a reliable and eco-friendly way to generate electricity, reducing your dependence on traditional energy sources. However, designing a camper solar wiring layout can be a complex task, requiring careful planning and consideration of several factors.
In this article, we will provide a comprehensive guide to creating a camper solar wiring layout, including the installation of a charge controller and battery. We will cover the essential components, wiring diagrams, and safety considerations to help you design a efficient and reliable solar power system for your camper.
Understanding the Components
Before we dive into the camper solar wiring layout, it’s essential to understand the key components involved:
- Solar Panels: These are the primary source of energy, converting sunlight into electrical energy. The type and number of solar panels you need will depend on your energy requirements and available roof space.
- Charge Controller: This device regulates the flow of energy from the solar panels to the battery, preventing overcharging and ensuring the battery is charged efficiently.
- Battery: This is the energy storage component, storing excess energy generated by the solar panels for later use.
- Inverter/Charger: This device converts the DC power from the battery to AC power, allowing you to run appliances and charge devices.
- Wiring and Connectors: These connect the various components, ensuring a safe and reliable flow of energy.
Camper Solar Wiring Layout Considerations
When designing your camper solar wiring layout, consider the following factors:
- Energy Requirements: Calculate your daily energy needs, taking into account the appliances and devices you plan to use.
- Roof Space: Assess the available roof space for installing solar panels, considering the size and type of panels you plan to use.
- Battery Size: Determine the required battery size based on your energy needs and the depth of discharge (DOD) you’re comfortable with.
- Charge Controller Capacity: Choose a charge controller that can handle the maximum power output of your solar panels.
- System Voltage: Decide on the system voltage, typically 12V or 24V, depending on your battery and appliance requirements.
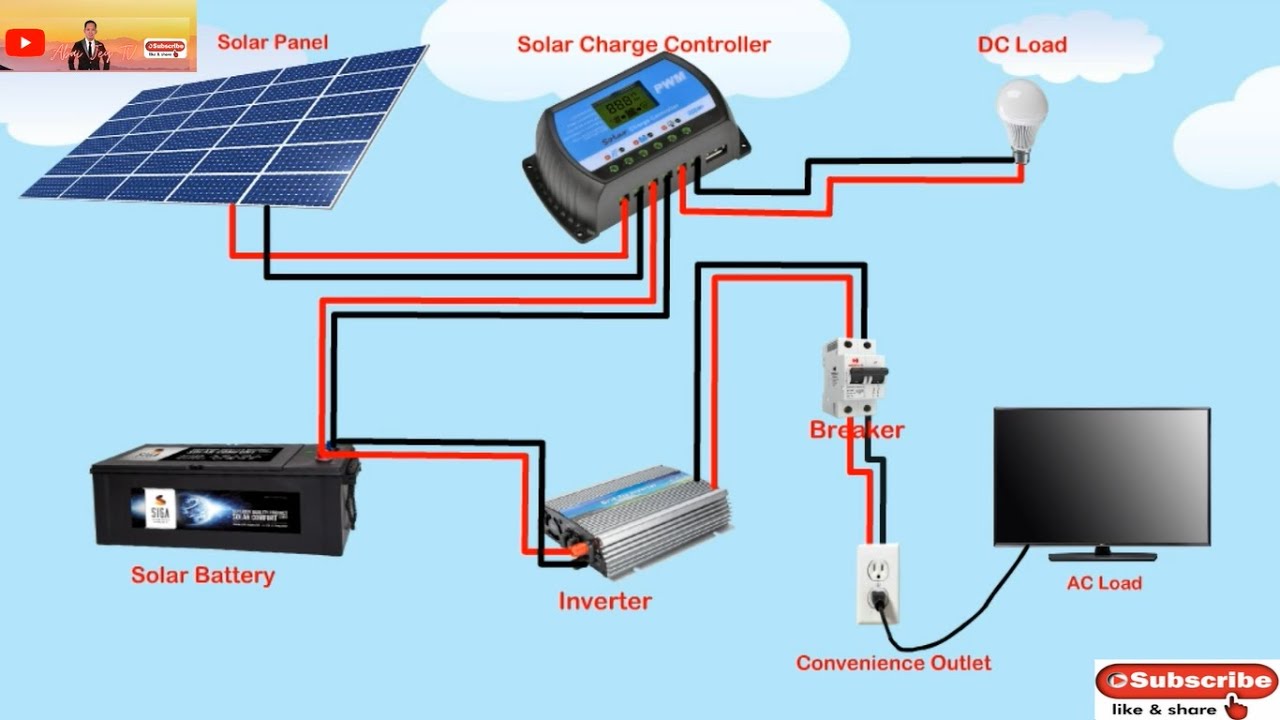
Wiring Diagram
Here’s a basic wiring diagram for a camper solar system:
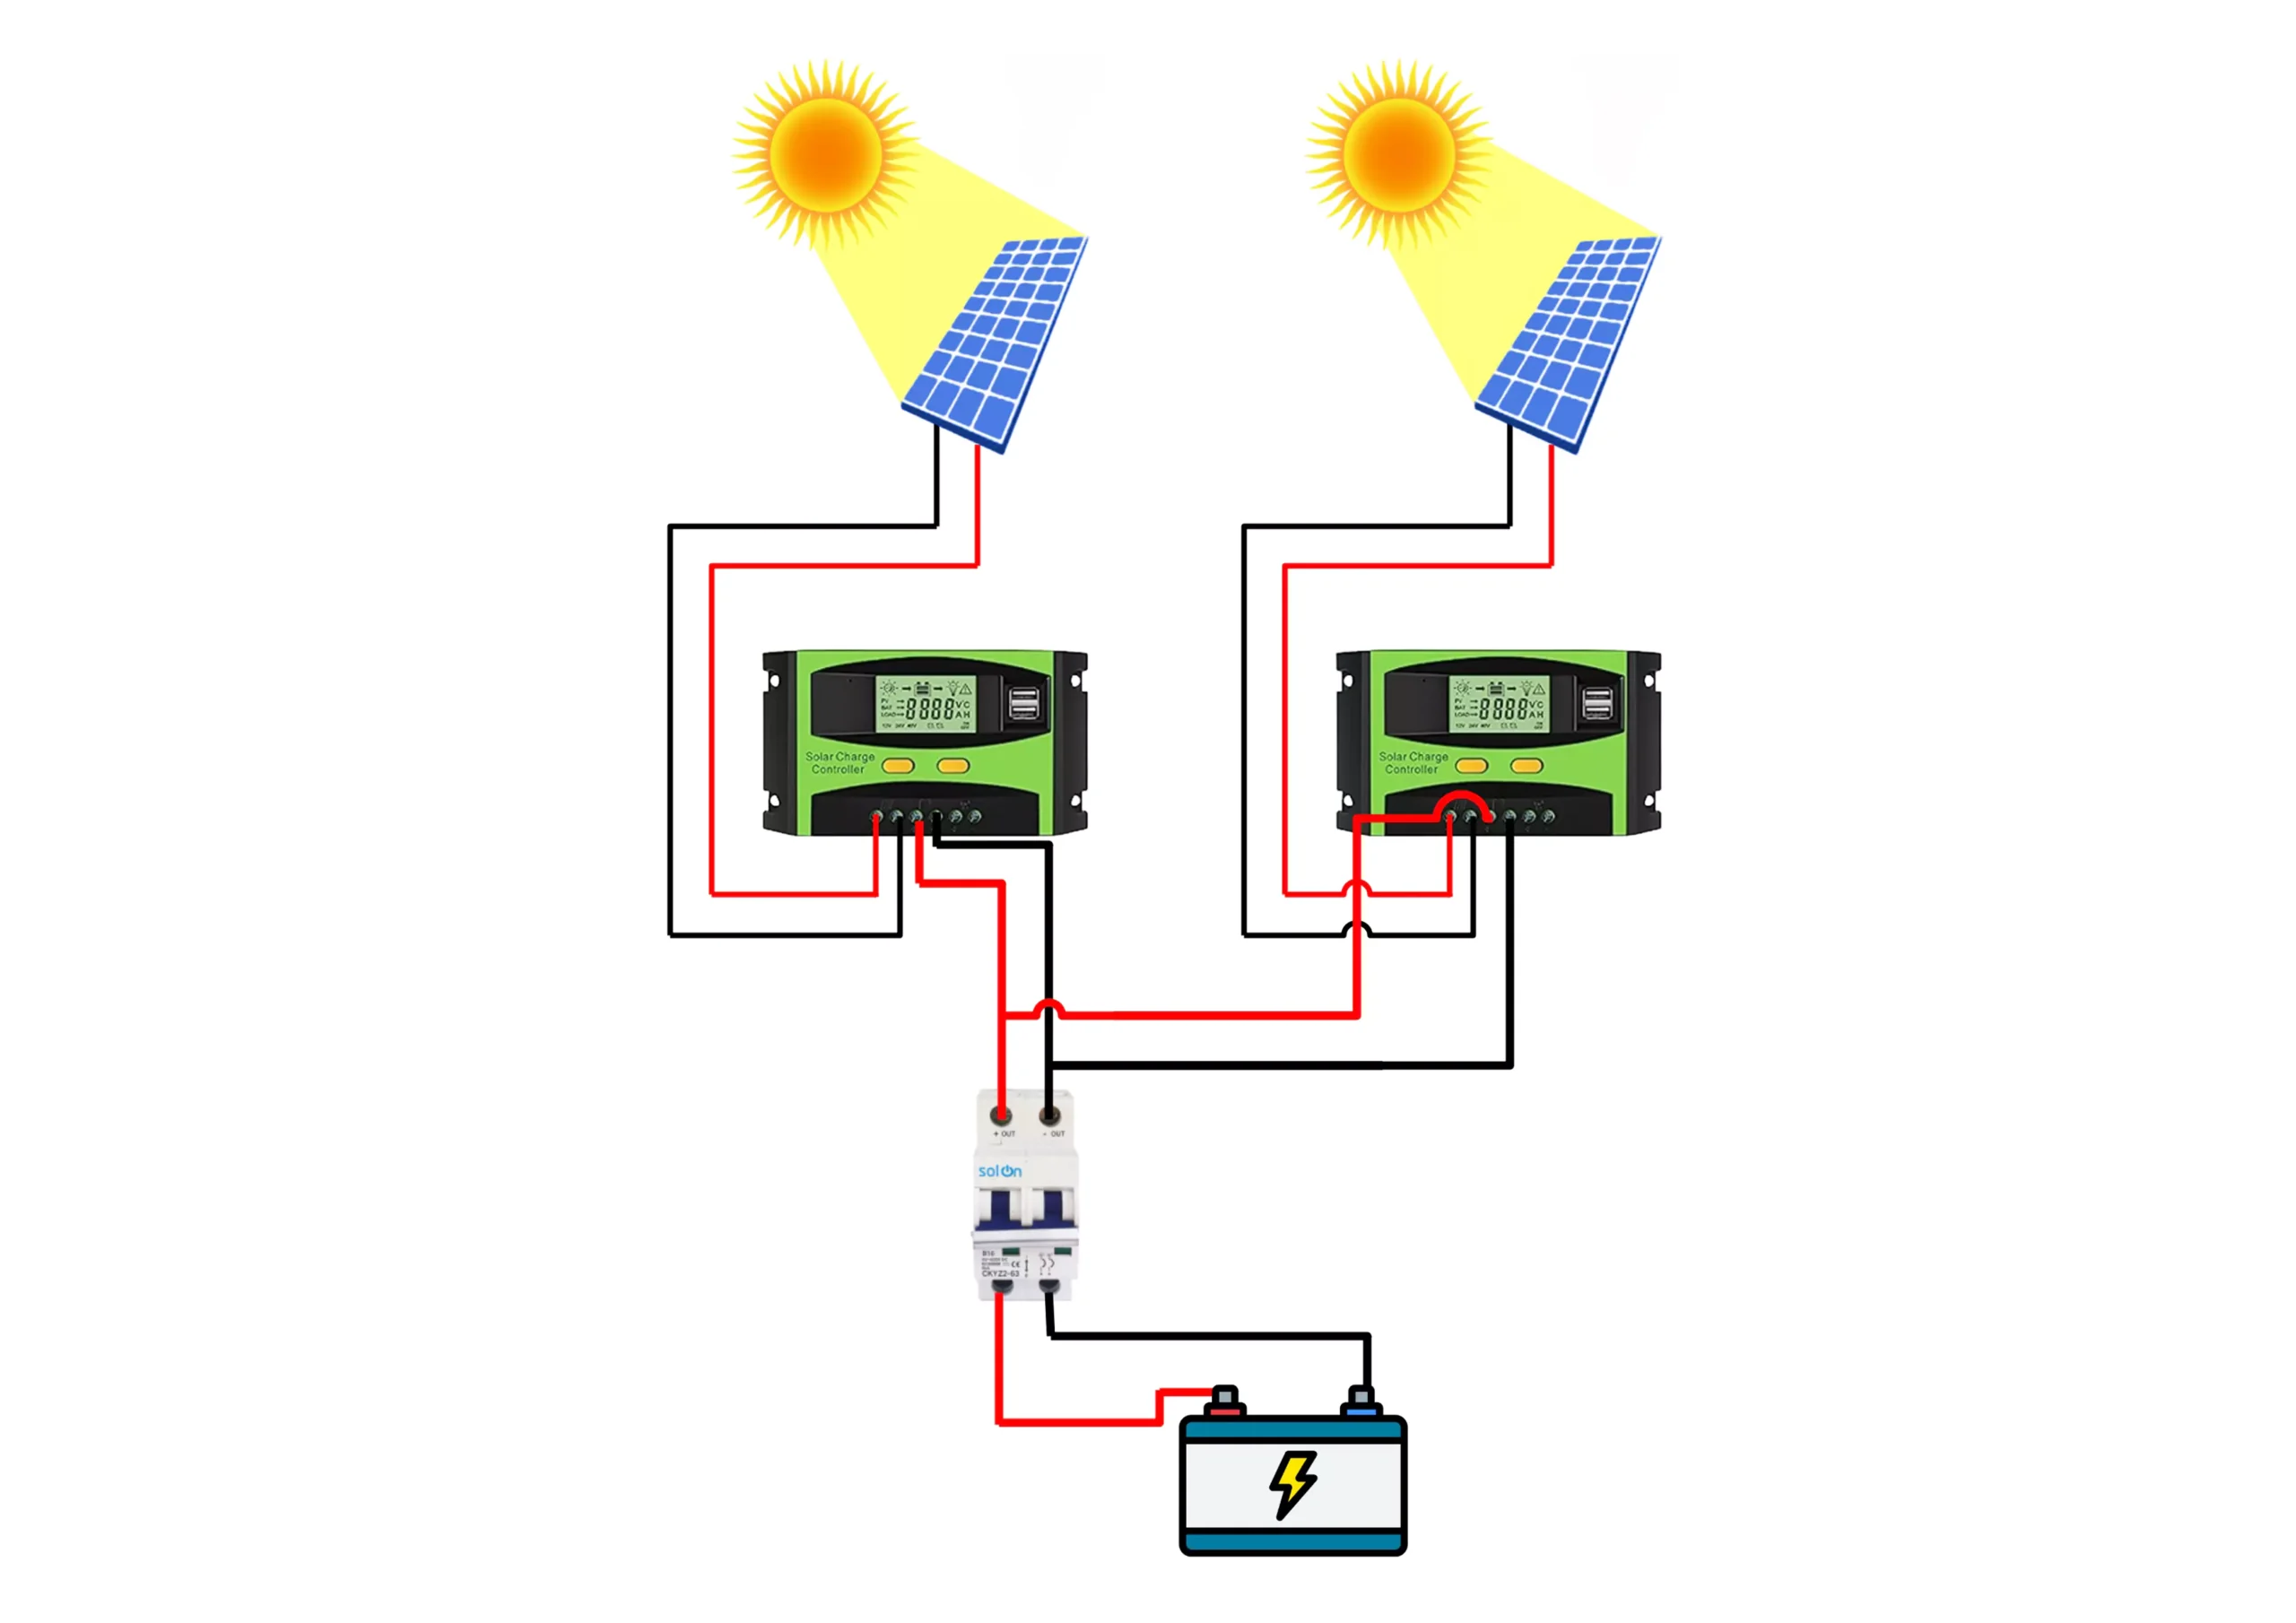
- Solar Panels: Connect the solar panels in series or parallel, depending on the voltage and current requirements.
- Charge Controller: Connect the solar panel array to the charge controller, ensuring the correct voltage and current ratings.
- Battery: Connect the charge controller to the battery, using the recommended wiring and connectors.
- Inverter/Charger: Connect the battery to the inverter/charger, ensuring the correct voltage and current ratings.
- Appliances: Connect the inverter/charger to the appliances and devices, using the recommended wiring and connectors.
Charge Controller Installation
Installing a charge controller is crucial to regulate the energy flow from the solar panels to the battery. When choosing a charge controller, consider the following:
- Maximum Power Point Tracking (MPPT): This feature ensures the charge controller operates at the maximum power point of the solar panels, maximizing energy harvest.
- Pulse Width Modulation (PWM): This feature regulates the charge controller’s output, preventing overcharging and ensuring a stable voltage.
- Voltage and Current Ratings: Ensure the charge controller can handle the maximum power output of your solar panels.
Battery Installation
Installing a battery is essential for storing excess energy generated by the solar panels. When choosing a battery, consider the following:
- Depth of Discharge (DOD): Choose a battery with a suitable DOD, typically 50% for deep cycle batteries.
- Capacity: Calculate the required battery capacity based on your energy needs and DOD.
- Type: Choose a battery type suitable for your application, such as lead-acid, AGM, or lithium-ion.
Safety Considerations
When designing and installing your camper solar wiring layout, ensure you follow these safety considerations:
- Electrical Shock: Ensure all electrical connections are secure and insulated to prevent electrical shock.
- Overcharging: Use a charge controller to prevent overcharging and damage to the battery.
- Short Circuits: Use fuses and circuit breakers to prevent short circuits and electrical fires.
- Grounding: Ensure the system is properly grounded to prevent electrical shock and equipment damage.
Tips and Best Practices
Here are some tips and best practices to keep in mind when designing and installing your camper solar wiring layout:
- Keep it Simple: Avoid complex wiring diagrams and focus on a simple, reliable design.
- Use High-Quality Components: Invest in high-quality components, including solar panels, charge controllers, and batteries.
- Monitor Your System: Install a monitoring system to track your energy production, battery state of charge, and system performance.
- Regular Maintenance: Regularly inspect and maintain your system to ensure optimal performance and extend its lifespan.
Conclusion
Designing a camper solar wiring layout can be a complex task, but with careful planning and consideration of the essential components, wiring diagrams, and safety considerations, you can create a reliable and efficient solar power system for your camper. Remember to keep your design simple, use high-quality components, and regularly monitor and maintain your system to ensure optimal performance and extend its lifespan. With a well-designed solar power system, you can enjoy the benefits of sustainable energy and reduce your dependence on traditional energy sources, making your camping experiences even more enjoyable and eco-friendly.