“Step-by-step solar panel wiring diagram guide”
However, installing a solar panel system can be a daunting task, especially when it comes to wiring the panels together. In this article, we will provide a step-by-step solar panel wiring diagram guide to help you navigate the process with ease.
Understanding Solar Panel Wiring Basics
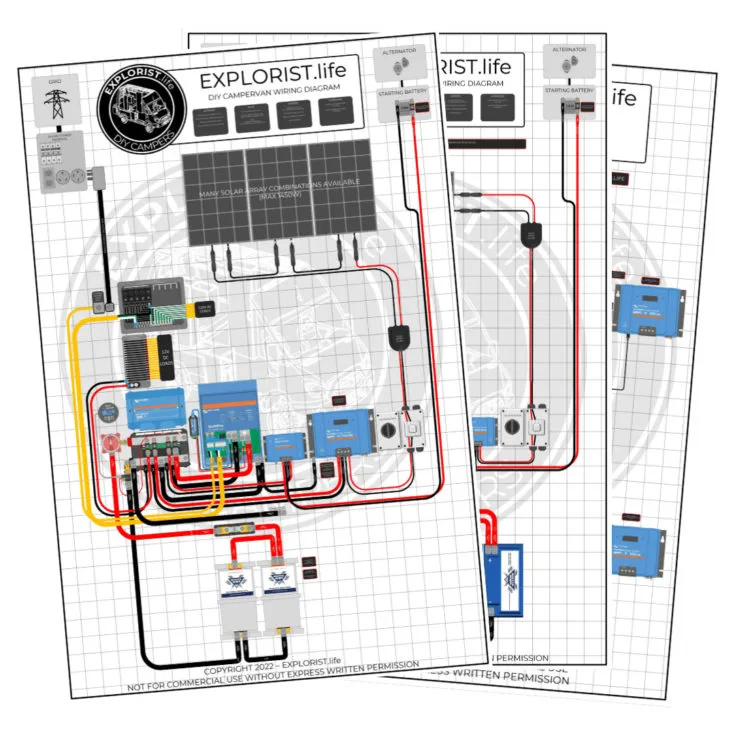
Before we dive into the wiring diagram guide, it’s essential to understand the basics of solar panel wiring. A solar panel system consists of multiple panels connected together to form an array. Each panel is made up of photovoltaic (PV) cells that convert sunlight into electrical energy. The energy is then collected and sent to an inverter, which converts the DC power into AC power that can be used to power your home or business.
Types of Solar Panel Wiring Diagrams
There are several types of solar panel wiring diagrams, including:
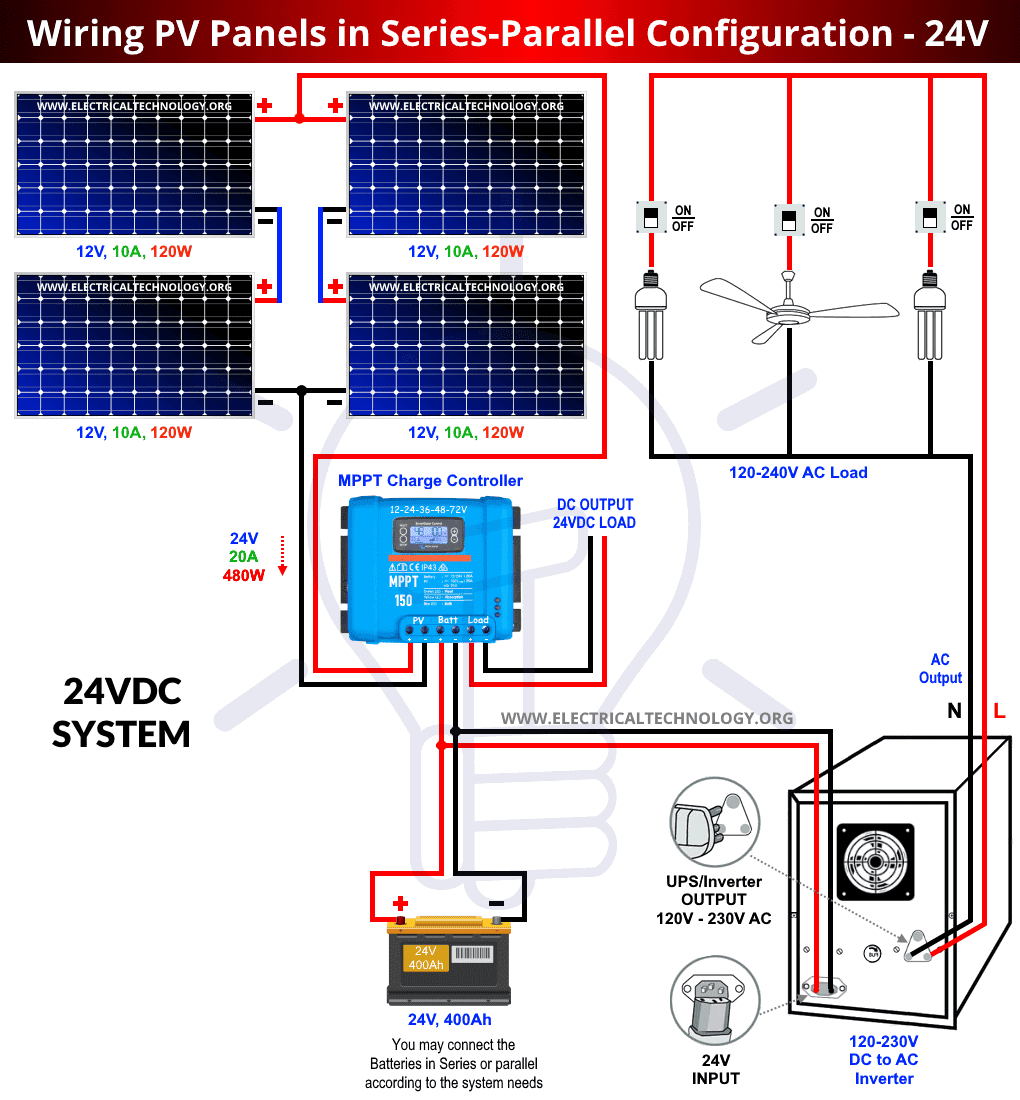
- Series Wiring Diagram: In a series wiring diagram, the panels are connected one after the other, with the positive terminal of one panel connected to the negative terminal of the next panel. This type of wiring is typically used for small solar panel systems.
- Parallel Wiring Diagram: In a parallel wiring diagram, the panels are connected in parallel, with each panel having its own positive and negative terminals. This type of wiring is typically used for larger solar panel systems.
- Combination Wiring Diagram: In a combination wiring diagram, the panels are connected in a combination of series and parallel. This type of wiring is typically used for complex solar panel systems.
Step-by-Step Solar Panel Wiring Diagram Guide
Now that we have covered the basics of solar panel wiring, let’s move on to the step-by-step guide. We will use a series wiring diagram as an example, but the principles can be applied to parallel and combination wiring diagrams as well.
Step 1: Plan Your Solar Panel System
Before you start wiring your solar panel system, it’s essential to plan your system carefully. Determine the number of panels you need, the type of panels you will use, and the size of your system. You should also consider the ampacity of your system, which is the maximum amount of current that your system can handle.
Step 2: Gather Your Materials
To wire your solar panel system, you will need the following materials:
- Solar panels
- Mounting hardware (e.g., clamps, screws)
- Wiring (e.g., MC4 connectors, cables)
- Connectors (e.g., branch connectors, combiner boxes)
- Inverter
- Charge controller (if applicable)
- Grounding equipment (e.g., ground rods, clips)
Step 3: Mount Your Solar Panels
Mount your solar panels on a suitable surface, such as a roof or a ground-mounted rack. Make sure the panels are securely fastened and pointed in the right direction (i.e., facing the sun).
Step 4: Connect Your Solar Panels
Connect your solar panels in series, starting with the first panel. Use MC4 connectors to connect the positive terminal of one panel to the negative terminal of the next panel. Make sure the connections are secure and not loose.
Step 5: Add Branch Connectors
Add branch connectors to your wiring diagram to connect multiple strings of panels together. A branch connector is a device that allows you to connect multiple wires together and provides a safe and efficient way to connect your panels.
Step 6: Connect to the Combiner Box
Connect the output of your solar panel array to a combiner box. A combiner box is a device that combines the output of multiple strings of panels and provides a safe and efficient way to connect your panels to the inverter.
Step 7: Connect to the Inverter
Connect the output of the combiner box to the inverter. The inverter will convert the DC power from your solar panel system into AC power that can be used to power your home or business.
Step 8: Ground Your System
Ground your solar panel system to prevent electrical shock and ensure safe operation. Use grounding equipment, such as ground rods and clips, to connect your system to the earth.
Step 9: Test Your System
Test your solar panel system to ensure it’s working properly. Use a multimeter to check the voltage and current output of your system, and make sure the inverter is functioning correctly.
Step 10: Monitor and Maintain Your System
Monitor and maintain your solar panel system regularly to ensure it’s operating at optimal levels. Check the system’s performance, clean the panels, and perform routine maintenance tasks as needed.
Tips and Precautions
When wiring your solar panel system, keep the following tips and precautions in mind:
- Always follow the manufacturer’s instructions for your solar panels and other equipment.
- Use proper wiring techniques and materials to prevent electrical shock and ensure safe operation.
- Make sure your system is grounded properly to prevent electrical shock.
- Use a fuse or circuit breaker to protect your system from overcurrent conditions.
- Keep your system clean and well-maintained to ensure optimal performance.
Conclusion
Wiring a solar panel system can seem like a daunting task, but with the right guidance, it can be a straightforward process. By following the step-by-step solar panel wiring diagram guide outlined in this article, you can ensure a safe and efficient installation. Remember to always follow the manufacturer’s instructions, use proper wiring techniques, and ground your system properly to prevent electrical shock. With a well-designed and well-installed solar panel system, you can enjoy the benefits of renewable energy and reduce your reliance on fossil fuels.
Frequently Asked Questions
Q: What is the difference between series and parallel wiring diagrams?
A: Series wiring diagrams connect panels one after the other, while parallel wiring diagrams connect panels in parallel, with each panel having its own positive and negative terminals.
Q: How do I determine the ampacity of my solar panel system?
A: The ampacity of your system depends on the number of panels, the type of panels, and the size of your system. Consult the manufacturer’s instructions and use a calculator to determine the ampacity of your system.
Q: What is a combiner box, and why do I need one?
A: A combiner box is a device that combines the output of multiple strings of panels and provides a safe and efficient way to connect your panels to the inverter. You need a combiner box to connect multiple strings of panels together and to provide a single output to the inverter.
Q: How do I ground my solar panel system?
A: Ground your solar panel system by connecting the negative terminal of the system to the earth using grounding equipment, such as ground rods and clips.
Additional Resources
For more information on solar panel wiring diagrams and installation, consult the following resources:
- National Electric Code (NEC) guidelines for solar panel installations
- Manufacturer’s instructions for your solar panels and other equipment
- Online tutorials and videos on solar panel installation and wiring
- Local electrical codes and regulations for solar panel installations
By following the step-by-step guide outlined in this article and consulting additional resources, you can ensure a safe and efficient installation of your solar panel system. Remember to always follow the manufacturer’s instructions, use proper wiring techniques, and ground your system properly to prevent electrical shock.


